
In photography, exposure is defined as the total amount of light allowed to fall on the photographic medium (film or sensor) during the process of taking a photograph.
Now we have learned that adjusting the size of the aperture and the time of the exposure (the shutter speed) are the basic tools which allow us to control the exposure. However, even if it seems quite obvious, it is worth emphasizing that the primary factor in determining exposure is how much light is illuminating (and being reflected from) the subject we wish to photograph. Aperture and shutter speed are then used to control how much of that light eventually reaches the film or sensor.

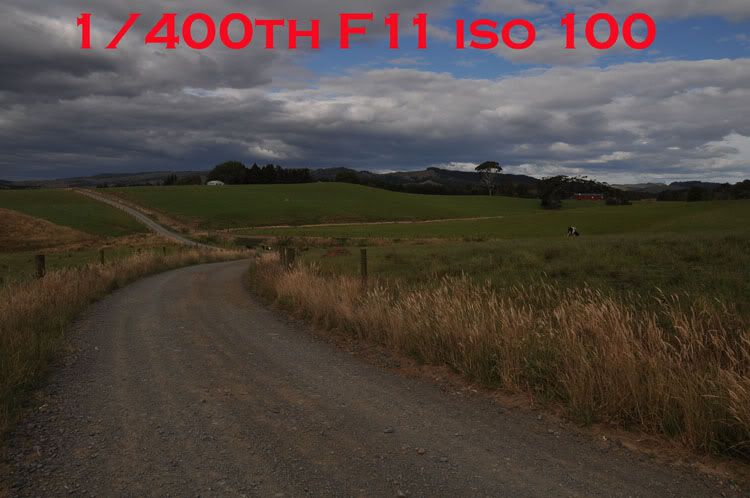
I mention this right up front because one will often read that the "exposure" of a photo was, for example, "1/250 sec. at f/8.0". This meager data sometimes confuses beginners. You should be very aware that, without some further information, these numbers, by themselves, don't give any real information about exposure. To convey even a rough approximation of exposure, the information must include, at minimum, some clue to the lighting conditions under which the photo was made. Was it a bright sunny day, a dark cloudy day, or in a closed room illuminated only by candlelight?

Therefore, when you need to choose a suitable combination of aperture and shutter speed, you must first determine the how much light is available. The old way to do this is by eyeball; perhaps not very precise, but when trained by experience it worked pretty well; (see the entry about the "sunny 16 rule" [at the bottom of that page]). Fortunately the fact that almost every modern camera contains a built-in sensitive instrument to measure the light (commonly called the exposure meter), relieves us of this task. Even better, many cameras made in the past couple of decades contain sophisticated mini-computers which, in conjunction with the exposure meter, will calculate and set the shutter speed or aperture, or both, with no intervention on our part.
If you are content to always let the automated camera make all of the exposure decisions for you, then you probably don't need to read much more of this section. The remainder is written for those who, at minimum, wish to know a bit more about how and why the camera automatically adjusts the exposure the way it does. It will be particularly important to those who want to take an active part in controlling the exposure parameters themselves and need to know what advantages are gained by so doing.

Exposure chosen by camera blew out highlights in the snow .

Adjusting exposure to retain detail looked more true-to-life even though the camera meter registered -1 under-exposure
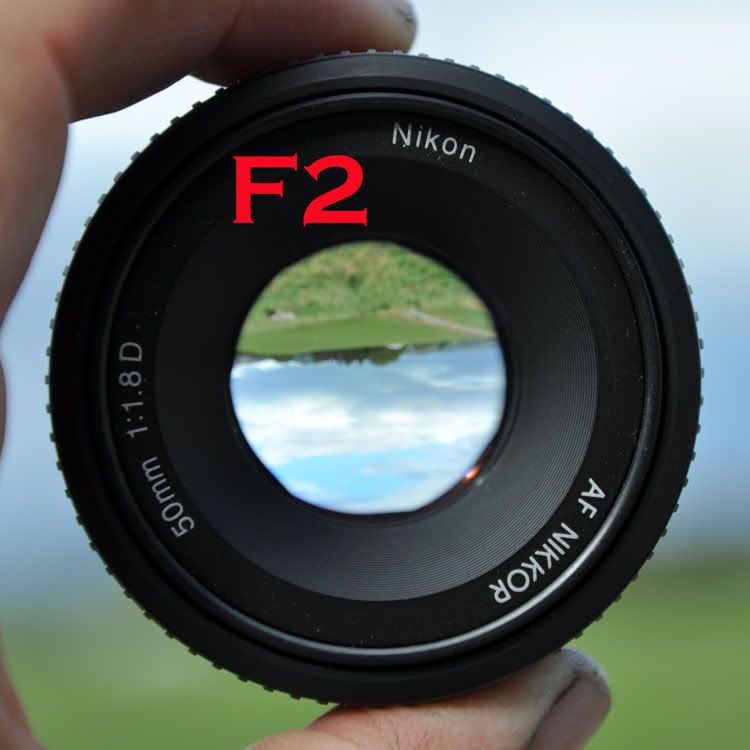
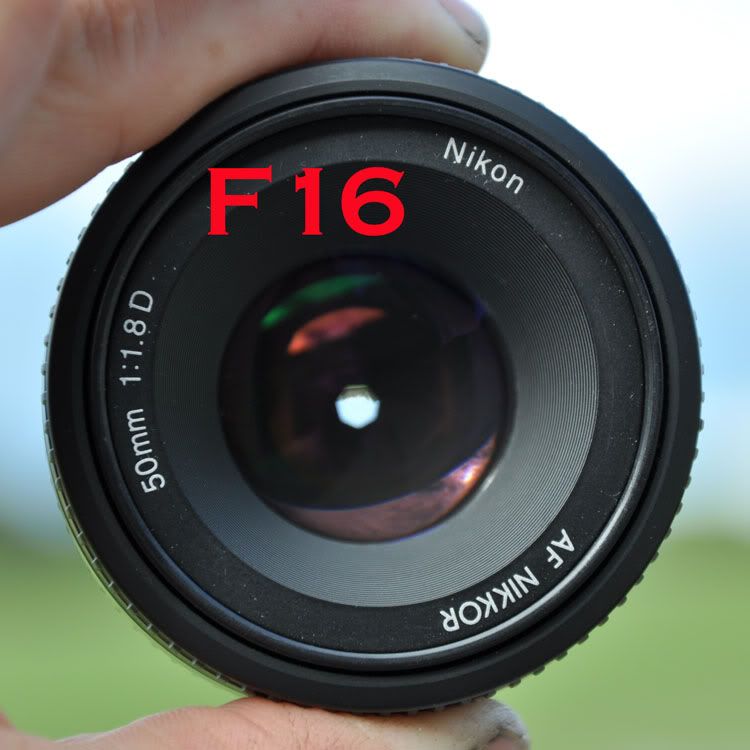
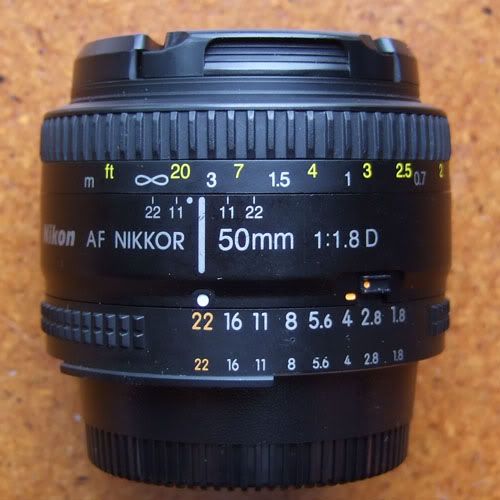
The first subject that needs to explored in just a bit more detail is aperture. You may have already read that the size of the aperture is designated by a rather strange set of numbers, and that the smaller the number, the larger the aperture. If you are having trouble getting your mind around this curious convention, it will make much more sense if you always think of the aperture number as the denominator of a fraction (the number that is on the bottom of a fraction). So if you are comparing, for example, F4 with F16, think of these values as 1/4 and 1/16. It should then be very clear which is the larger aperture.
Next let's consider the set of values that you might find on the aperture ring of a typical lens. (For those who may have a lens without an aperture ring, stay tuned; we will discuss that later).
2.0 | 2.8 | 4.0 | 5.6 | 8.0 | 11 | 16 | 22
The smallest value on some lenses may be less than or greater than 2.0 (more about that later); and you may run into a few lenses where the largest value is more than 22.


The most important feature of the above series of values is that each value represents an aperture that is exactly one half the area of the value immediately to its left, and therefore allows exactly one half as much light to reach the sensor. And, although it seems really obvious, to hammer home the point observe that: if you read the series from the right to the left, each value represents an aperture that is double the area of the value immediately to its right. In the jargon of photography moving from one value to the immediately adjacent value is known as a change of "one stop". Said another way, changing the aperture value by one stop means halving or doubling the area, and thus the amount of light allowed to reach the sensor.
Note that throughout the preceeding paragraph I have written the word area in bold face type. I did this to stress the idea that the exposure (the amount of light reaching the sensor) is directly proportional to the area of the aperture rather than the aperture diameter. However the rather curious series of aperture values listed above are computed directly from the diameter. (For those who are interested, the math involved in converting diameter to area results in this unintuitive sequence of values represents a doubling or halving of aperture area.) In any case it's worthwhile to become familiar with this series. If you can remember just the first two values, you can construct the rest of the series by doubling the value two places to the left. (i.e. 2 x 2.0 = 4.0; 2 x 2.8 = 5.6; etc.)
Now, for those with inquiring minds, I want to expand a bit concerning the above series of aperture values. In my collection I have four lenses each of which has, as its initial aperture number, a value less than 2.0. These values are: 1.4, 1.5, 1.7 and 1.8. Only one of these values, 1.4, represents an aperture that is exactly a one stop larger than 2.0, and thus fits the criterion of the series. The other values are a result of the manufacturer producing a lens whose maximum aperture is larger than 2.0, but not twice as large (in area). So if you have such a lens, keep this in mind. The aperture values that follow these odd values are exactly the same as shown in the series above. I have another lens whose initial (lowest) aperture value is 3.5. The next highest value that can be set is 4.0, but there is nowhere near a one stop difference between these two apertures. So, as a general rule going from one aperture value to the next usually represents a one stop change (doubling or halving) of exposure. But like every rule there are exceptions. Fortunately these exceptions, when they occur, are confined to the initial (smallest number) aperture value.
Speaking of exceptions, if you have a modern digital camera where the aperture value is set using a dial or other control built into the camera body and displayed on an LCD panel (as opposed to using a ring on the lens itself), well you can throw this rule out the window. Most such cameras allow you to choose the increment, when going from one aperture value to the next. You may set the camera so that the interval is 1 full stop or 1/2 stop, or 1/3 of a stop. So, if a one stop change doubles or halves the exposure, how much does 1/2 stop change the exposure? That's a tricky question; for now it's enough to know that the change is less than that of a full stop.
Next we discuss the second variable that allows us to control exposure: shutter speed. If you were to examine an older camera, you would find a control dial showing something like the following series of shutter speeds, in fractions of a second:
1/15, 1/30, 1/60, 1/125, 1/250, 1/500
What you should note is that each value in this series reduces the time the shutter is open by one half, and therefore allows exactly one half as much light to reach the sensor. This corresponds exactly to the series of aperture values listed above. The result of this relationship is particularly convenient when, for example, you know the correct exposure is F8.0 at 1/125 sec, but you wish to use a faster shutter speed (e.g. when subject is in motion). You will achieve exactly the same exposure if you change the shutter speed two steps, to 1/500 sec. and change the aperture two stops in the other direction, to F4.0.
Modern digital cameras control shutter speeds electronically. As a result you will find that one can choose from a much finer spectrum of shutter speeds where the intervals are smaller than a doubling or halving of the adjacent setting. To maintain the convenient correspondence between aperture and shutter speeds, those cameras that allow you to choose the interval between aperture values will automatically set the same size interval between shutter speeds. This means when you increase the shutter speed by two "intervals" you will achieve the same exposure by changing the aperture by two "intervals" in the other direction.
Terminology: I have stated above that the traditional unit for a change in aperture that results in a doubling or halving of exposure was a stop. Very strictly speaking this term was restricted to aperture changes. The traditional unit for a change in either aperture or shutter speed that results in doubling or halving of exposure was a step. However many respected authorities have used both terms interchangeably. Modern terminology, and that used in most camera manuals I have seen, introduced a new term: Exposure Value (EV). The meaning remains the same. A change in EV of one unit denotes a doubling or halving of exposure. Thus your new camera may give you the option of setting the interval between adjacent aperture values, shutter speed values, and also ISO values (to be discussed later) to 1/2 EV or 1/3 EV.
To recap, we have learned that the first variable which affects exposure is the amount of available light. Next we have the aperture and shutter speed which control how much of that light reaches the sensor. There is one additional variable which, while it does not control exposure per. se., it does determine how the sensor responds to light. I am referring to ISO, a value that describes the sensitivity of the sensor. The greater the sensitivity, the less total light needs to reach the sensor to produce a properly exposed photograph. Film is manufactured with a range of ISO values, but once you put a roll of film in the camera you were stuck with that ISO value until you changed film. Digital cameras allow us the luxury of changing the ISO (the sensitivity of the sensor) from one shot to the next. The ability to increase the ISO allows us to get shots where the available light is meager and we have already maxed out the exposure with the aperture and shutter speed controls.
F2.8 , 1/125th sec , iso 1600
Also see "Exposure explained by Damien of nikongear.com " 


No comments:
Post a Comment