Beginners " I just bought a DSLR " version :
To get the correct exposure there are three variables you need to be aware of :
1.) Aperture : The opening that lets the light through the lens .
Small number = large aperture ........ and large number = small aperture .
This terminology was badly named and causes much confusion amongst beginners .
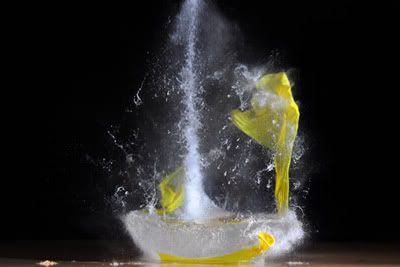
2.) Shutter speed : Perhaps the easiest to understand - if the aperture is a tap then shutter speed is the amount of time you keep the tap open .
To get the correct exposure , or fill a glass of water , you have to make sure that your aperture and shutter speed settings give the same results with any combination of these settings .
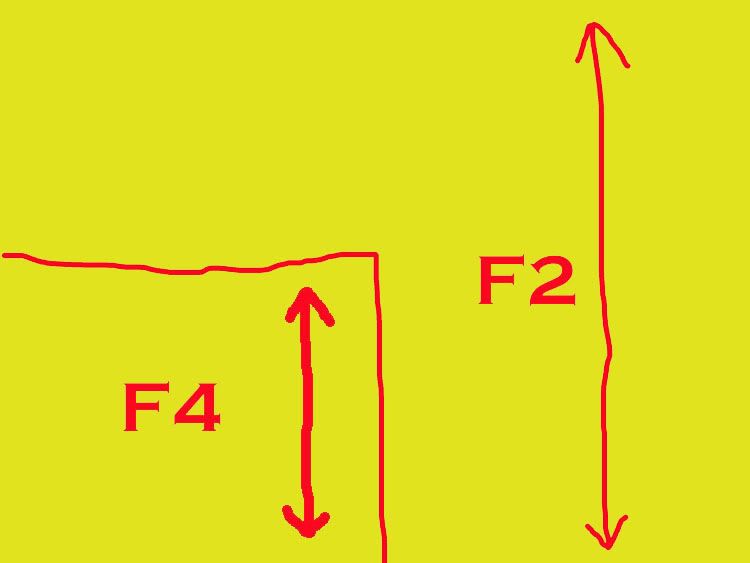
Open the tap wide to F2 and you will only need to keep it open for one second to fill that glass . Close the tap to F16 and you will suddenly need to keep it open for 32 seconds to fill that same glass !
Key point : Aperture and shutter speed determine how much light you let into the camera
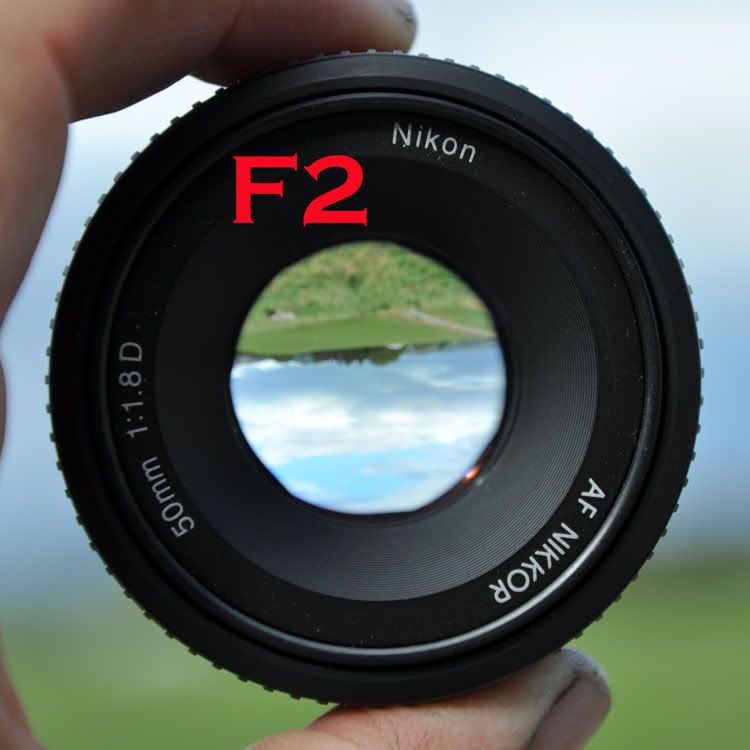
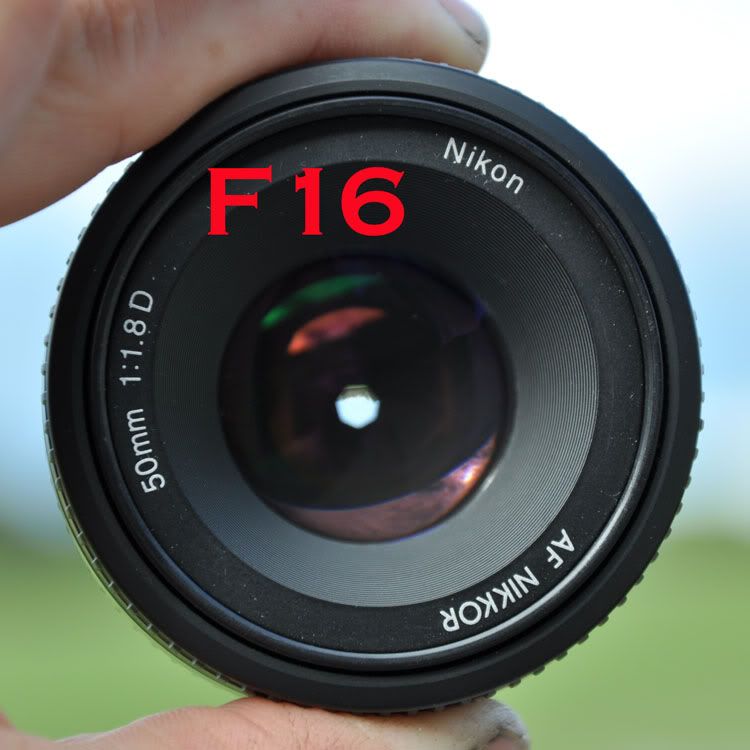
Just keep something in mind for when we discuss "depth of field " ... [ dof ] in future . The tap on the left illustrates F2 with the 'light' gushing in at all angles while the tap on the right illustrates F16 with the 'light' coming in much slower but at a sharper angle , this may help you to picture in your mind why pictures at F16 look sharper than pictures at F2 .

3.) iso : This is an electronic setting in the camera that "amplifies the signal " you let in with the other settings . The other two settings control " how much light you let in " [ " How strong your ''signal' is " ] while iso is like the volume control on your radio , when you have a weak signal you have to crank it up to get the results you need . If it is a very weak signal you get ''hissing'' in the form of "noise" which means lower quality ..... but you can't always control your light source so sometimes this is the only option to get the results you need .
Most radios have circuits to suppress the hissing by filtering out anything that is not the 'radio station' that you are tuned in to . In your camera this is your 'noise reduction' setting . But when the signal gets extremely weak it reaches the point where the radio doesn't know what is the radio station and what is 'hissing' and eventually when you have a really weak signal you can hear the music and loud hissing because they are equally strong .
In your camera this is when you see bad noise in the image .... you're not letting enough light in . See " exposure and noise " .
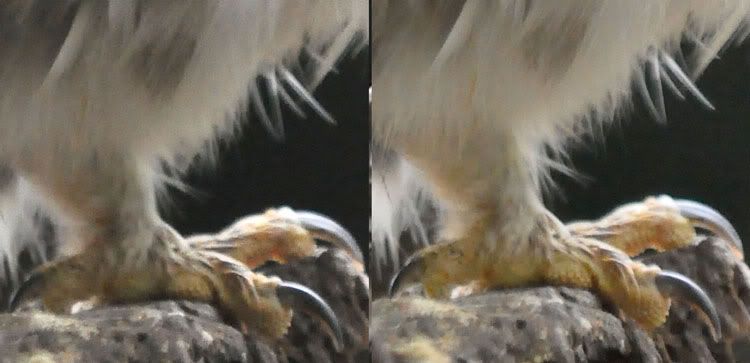
These two images were both taken at iso 3200 , the one on the left was taken at a faster shutter speed and let in less light so the 'hissing' showed up a bit too much , the one on the right was taken at a slower shutter speed so the sensor received a 'stronger signal' [ more light ] which overpowered the 'hissing' which was still present , the 'signal' was just stronger than it .
Key point : Iso decides how much electronic amplification you perform on that light you receive from the other two .
The next step : "I understand the basics and want to know more " .......
[ If you understand the above then read further . if you don't then contact me and let me know how I can improve the explanation . ]
Have a play with settings on the 'virtual camera'
1.) Aperture : they made it really complicated by naming apertures the way they did [ big number small aperture , small number big aperture etc. ] .
It is basically a ratio of the diameter of the aperture to the focal length of the lens . It would have been easier to understand if they named F2 something like F1/2 and F4 as F1/4 because they are ratios .
Have another look at this lens . It is a 50mm focal length which means that F1 would be an aperture with a 50mm diameter [ 50 X 1/1 ] .
F2 means the diameter is " 50/2" mm wide or 25mm . [ 50 X 1/2 ]
F4 means the diameter is "50/4" mm wide or 12.5 mm . etc . [50 X 1/4 ]
To go one step further before anyone starts thinking that F2 to F4 is one "stop"difference [ a "stop" is either half the light or twice the light in either direction ] , let's look at the area factor .
Working with circles and calculating area makes things even more complicated so I've compared it using squares : If F2 is a diameter of 25mm and F4 is a diameter of 12.5 mm then F4 is half the diameter of F2 but due to the fact that we are working with area it is actually 1/4 the area .
 So : F2 lets in 4 times as much light as F4 , F4 lets in 4 times as much light as F8 etc . which leads us to the next step .
I used numbers that simply made it easier to show calculations and they are two stops apart from each other . This is what a 50mm F1.8 lens looks like .
Since it starts at F1.8 they show that at the bottom of the scale so you know the maximum aperture , realistically they should have F2.0 on the scale .
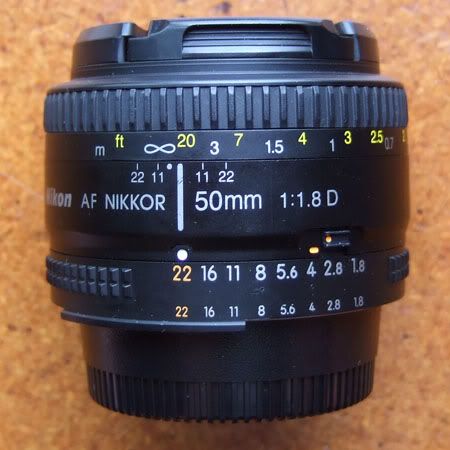 The aperture scale goes 1.0 , 1.4 , 2.0 , 2.8 , 4.0 , 5.6 , 8 , 11 , 16 , 22 , 32 ....
You'll notice that the numbers don't make much sense one after the other but each second number is doubled [ 1.0 , 2.0 , 4,0 , 8,0 .... as opposed to 1.4 , 2.8 , 5,6 , 11 , 22 ..... ] .
This means that if you double any aperture you are working with you are changing by two stops [ 4 X or 1/4 the light either way ] .
Going from F2.8 to F5.6 means you are taking in 4 X less light .
Going from F5.6 to F2.8 means you are letting in 4 X as much light .
Now some more about iso :
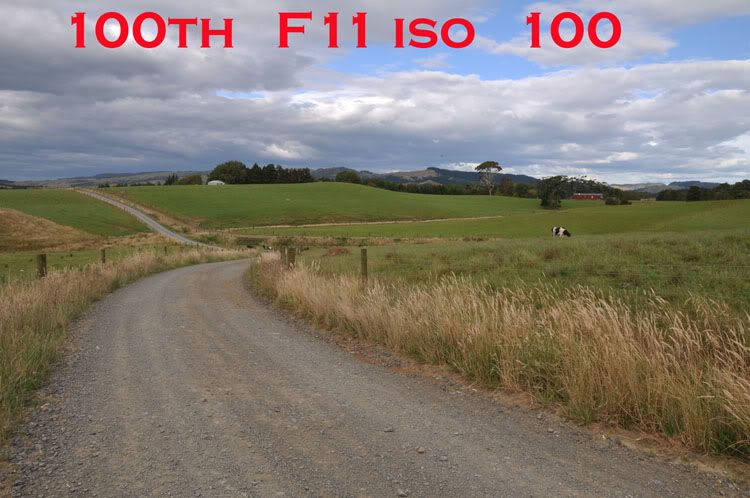
I took these pictures on an 'F11' day [ see "sunny 16" rule below ] all at the same iso , F11 and varying shutter speeds to show why you get noise at higher iso's .
Here's the 'correct ' exposure at iso 100 , a good setting for high quality images with most cameras . { a side issue is that the base iso is 200 for most Nikons so iso 100 is not the best quality setting for these cameras }
 Now to give an idea as to what you are doing to your poor camera when you use iso 3200 we go to 1/3200th sec and divide that light by 32 essentially . This is what the sensor 'sees' at these settings .....
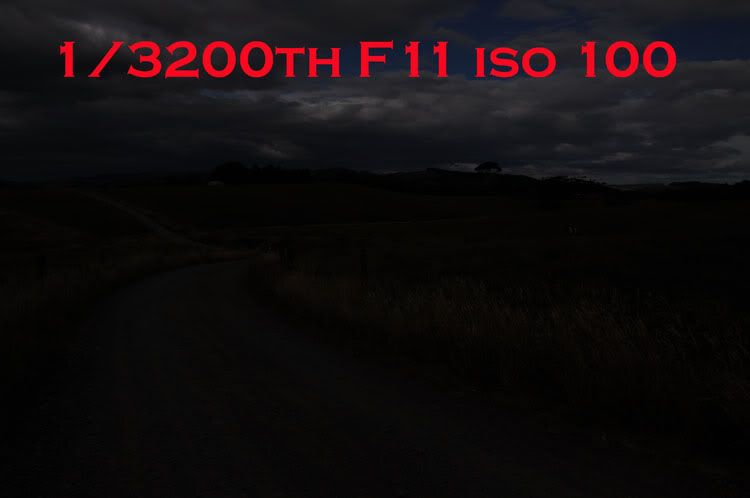 As you can see that image was still taken at iso 100 but it is showing you how much actual light you are letting in at that aperture and shutter speed before the camera has to try and make it look correctly exposed with the iso setting . If I had taken it at iso 3200 it would have looked similar to the first image , but with more 'noise' .
You are essentially using your aperture and shutter speed to let in 32 times less light than needed for a correct exposure and telling the camera electronics " here , amplify this 32 times and give me a correctly exposed image " .
The newer cameras are getting quite good at higher iso's but only use them when necessary , perhaps when you have 32 times less light to start with and have no other option but to 'amplify ' that signal for acceptable results .
The " Sunny 16 " rule
It may sound strange but learning the " sunny 16 " rule helped me understand all of this better .
"Sunny 16" is a "pivotal point" to me in that many calculations can be worked out from this rule .
The rule states that 'if your iso and shutter speed are equal then on the clearest sunniest day you can get you will get correct exposure at F16 ' .
Something like this :
iso 100 F16 1/100th/sec
iso 200 F16 1/200th/sec
iso 400 F16 1/400th/sec
.
.
iso 3200 F16 1/3200th/sec .
These will all give the same results and when you think about it this shows us how much easier it is to work with shutter speed and iso than the crazy numbers of aperture .
It's like this , on your camera a shutter speed that shows "200" is actually 1/200th sec .
iso 200 X 1/200th = 1
iso 400 X 1/400th = 1
iso 3200 X 1/3200th = 1 etc.
Now go outside on a sunny day and try it . Set your iso and shutter speed to "200" [ base iso for a Nikon ] and see what aperture you need to shoot at to get correct exposure . Quite often you will find that you need around f11 even on a sunny day because you very seldom get a perfectly clear day . This means that the day is half as bright as it could be because F11 is actually one 'stop' above F16 [ it's twice the area and therefore lets in twice as much light as F16 ] , usually due to haze that you don't even notice in the air .
If for example you find that the camera chooses F8 when your shutter speed and iso are the same then that means there is 1/4 the light as on a 'sunny 16' day [Since F8 and F16 refer to diameter ratios the actual area ratios will be the square of that , 1/2 the diameter ( 8/16) = 1/4 the area ]
This can be very useful to remember - you are going to a sports event wanting to know what shutter speed you will be able to use , or shooting an outdoor wedding and wanting to use flash and you can do some calculations at home .
For the sports event the 'best' lighting you can hope for will be 'F16' at equal iso and shutter speed so you know that , at best , you could shoot .....
at iso 200 F16 and 1/200th
or iso 200 F8 and 1/800th
or iso 200 F4 and /3200th ......
If it is a hazy sunny day then you can work around F11 with the same figures
iso 200 F11 and 1/200th
iso 200 F5.6 and 1/800th
iso 400 F5.6 and 1/1600th
For the wedding , if you know your maximum synch speed for your flash is 1/200th then with the 'worst ' lighting for flash [ an ' F16 ' day ] you will have
iso 200 F16 1/200th which needs a lot of flash power [ see high-fp flash ]
By putting your camera at these settings the night before , and then looking at the back of your flash to see what working distance it tells you that you have , you can get a good idea how close you will have to be to people to get the flash exposures you want , at worst , if it is a very bright day .
Considering the fact that you will probably be shooting at -1.7 mainly as fill-flash you can almost double that distance that the flash head tells you - because TTL flash assumes it will be the only light source while you will only be wanting it as fill flash .
Most of the time you won't have more than an ' F11 ' day but if you want to under-expose the background by one stop for a better effect you will be back at the 'f16' settings .
Anyway some will say that the ' sunny 16 ' rule for making calculations on the day is obsolete with modern cameras - but it sure comes in useful before the day to work out what you might be up against :)
If anything is unclear please let me know so I can ' fix ' it :) .


You are amazing!
ReplyDeleteThanks very much :)
ReplyDeleteDesmond, I teach digital photography at a small Jr. College in Central Illinois. I love the way you teach. I will use your site in class, if you don't mind. Smile Bob
ReplyDeleteThanks - that's what it's here for ! :)
ReplyDelete