Tuesday, August 15, 2017
New Website
I've finally set up my own website springbokphotography.com and am advertising to shoot weddings and portraits again. I will also be doing high speed photography tutorials.
Friday, May 13, 2016
You don't have to take sides!
RAW vs jpeg, Canon vs Nikon, pc vs Mac, dx vs full frame - You can actually use both!
Over the last few years of reading, and getting involved in, "debates" about which is best I have noticed that many people simply defend the "camp" they have chosen because .... they own one or use a particular format and want to defend their decision. It is generally a deep down desire to justify the money they have spent and defend their decision to choose that "camp". [I use the word "camp" to cover camera models, dx vs fx, RAW vs jpeg, Mac vs pc, prime vs zoom - but it applies to every "which should I use/buy" scenario where people seem to move to a particular "camp" to join and support]. Not to dismiss the people who actually know a really good reason why they use a certain format but they are regrettably in the minority while the vast majority who argue about the subject, and find ways to put down or insult the other camp are not among them. That majority have not come to understand the plain and simple truth that when there is a lot of debate from two or more camps it is because BOTH options have their merits and can be used! Many of their comments are simply repeating what they have heard without actually doing any tests for themselves.
Since people don't want to simply read an article about photography without pictures I will throw some in as well - not to argue about which is better but I will mention what was used because people will want to know. This was taken with a Nikon D90 and the 18-200mm super-zoom in jpeg mode. It doesn't prove anything about which anyone should use because it could have been taken on a full frame Canon with a prime lens in RAW mode and the two images side by side would show a quality difference at 100%, but the thing is - nobody has ever questioned the quality of this image so I'm happy with the result. Normal people don't view images at 100% side by side with other formats so even though I could use 'better gear' and deep down in my heart I would know that the one image is superior by a few percent I would be the only one to know that.
A commercial photographer will obviously want the best image quality they can get and if you're making a living from photography and providing a product to a customer then obviously you would want to know you are providing the best you can. Shoot full frame in RAW with a prime lens in a studio [if that's your profession] and you will have an edge over dx in jpeg with a superzoom.
But then someone like that would already know that and wouldn't need to be told, so this discussion is aimed at people getting into photography who don't yet have a hope of making a living from it and are overwhelmed by "advice" that you absolutely MUST shoot with certain gear at definite settings or you're doing it wrong.
Prime vs zoom? Generally a prime will let in more light and be a bit sharper but that isn't a blanket statement, there are some fast zooms that out-perform primes but this is usually the exception rather than the rule. What about a super-zoom? Many will tell you what junk they are "compared to a prime" but when it comes to versatility the super-zoom will always win. In some conditions the super-zoom won't be able to let in enough light and the prime will shine. The point? You don't have to pick sides, have BOTH in your bag if you want because they both have their strengths and weaknesses. The following image was taken with a 6 meg Nikon D40 and 18-200mm lens - the same scene at two different focal lengths taken seconds apart when the wind was howling, and changing lenses would have resulted in sand, not dust, in the camera. Of course both scenes would look slightly better with two primes but - how many people would notice unless they were magnified to 100% side by side?

I did some tests with the 70-200mmVR f2.8 compared to the 18-200mm VR both at f7.1 and could not tell the difference between the images, so I got rid of the 70-200 because all it meant for my type of shooting was that I was often bumping up against the 70mm end trying to go wider and if I can't get the shot I want because I can't change lenses fast enough then I'm quite happy to take a loss in image quality, that I can't see unless I'm at 100%, in exchange for getting my shot. In my tests I also compared the 85mm 1.8 lens and also couldn't see a difference unless they were side by side at 100% and it was only a slight difference - to me that is, if you can see a bigger difference in your style of shooting and that is what you want then it's nobody else's business if you choose primes instead - this isn't a "pick a side" discussion.
Yes f2.8 [1.8 with the 85mm] is superior to f5.6 and in really low light you'd be a bit silly to shoot with a superzoom that has you at very high iso and slow shutter speeds - use whatever works but don't think that's an excuse to put down people who use different gear in different situations.
I was involved in a discussion on a forum where a member who had previously raved about the superiority of his 30mm f1.4 lens made a comment that his lens was dropped and couldn't be used so he put on this 24-120mm lens and has kept shooting with it because he can't tell the difference in the images and reasoned that it was his increased experience over the years that was giving the good results rather than the expensive lens. Of course his zoom lens couldn't do f1.4 but since he was shooting landscapes it didn't matter because he as always at smaller apertures. If you can afford it keep both in your bag - if you can't then a super-zoom will do most of what you need as a beginner.
RAW vs jpeg? If you know what you're doing you don't need to read this - it's meant for those who aren't totally sure of what they are doing.
Well you can turn a RAW into a jpeg but you can't turn a jpeg into RAW which is one big advantage of RAW mode, along with all the extra information you have to work with. Perhaps for beginners who don't know how to edit properly that is not an advantage if they shoot RAW only. My advice is to shoot RAW+jpeg until you know enough to make an informed decision, not what someone else has informed you but rather what you have learned, to decide for yourself. Many of the comments and demonstrations on the discussions involve fixing mistake you shouldn't have made in the first place. These 'strengths' are obviously a very useful 'insurance' policy to fall back on if you're doing an important shoot and perhaps forget to change your settings, and should not be dismissed, but perhaps not the best way to convince someone they should only use that one mode - for fixing mistakes. RAW is obviously superior in many other ways apart from being bigger files and slowing down your camera. Having said that I only shot jpeg for 10 years then set my D7200 to RAW to one card and jpeg to the other when I got it and still only use the jpegs.
D40 18-200mm jpeg. This image is not one of those "I shot this in jpeg therefore you should shoot in jpeg" arguments because comments like that are worthless without a direct comparison to view - just something to brighten the screen and perhaps show that you don't have to pick sides because you can get good results using either way, or even better - both ways.

My own personal approach to photography was to try to get my settings right in-camera and get the basic foundations of a photo right first like exposure and white balance. If you want to teach someone to shoot accurately you let them practice with an air rifle [jpeg] then they have to get it right. If you give them a shotgun [RAW] they will almost always hit their target and think they have good aim. If they suddenly have to use the air rifle one day [running out of space on the memory card] the results might not be so good. Fortunately[?] modern sensors are more forgiving of bad exposure these days.
A shotgun and air rifle strapped together [RAW+jpeg] will allow them to hit their target and check whether their aim as spot on. To ensure putting food on the table RAW is highly advisable.
Editing images is a bit like modifying a house, if the foundation and basic structure isn't strong enough it will show very early in your modifications.
The advantage of shooting in RAW and jpeg is that you can compare your results from editing a RAW image with the jpeg that the camera produced - which would also need a bit of a tweak too.
That way you can have the advantage of both camps, the ability to choose all your processing settings plus comparing your results with what the manufacturers deem to be ideal - you may be surprised how much you lack in editing skills if you have only ever shot RAW and suddenly compare your results to jpegs from the same images - try it if you dare, you may be surprised.
Don't get sucked in to the discussions that show an un-edited and under-exposed jpeg compared to a fully edited RAW image - of course the RAW will look better. All it proves is that people who don't know how to expose properly and don't edit jpegs should use RAW as a crutch. It can be a useful crutch to fall back on occasionally but if that's the only reason you use it then you're doing something wrong. I'm sure many of us could post a flat looking RAW image compared to a well processed jpeg and sway the minds of the inexperienced photographers that jpeg is superior - be sure that the discussions you read are unbiased or they will be set up to deliberately make the one look inferior.
Some comments you will come across:
"With jpegs you are throwing away information" - But isn't that what you do anyway when you edit a RAW image and show everyone the jpeg? The real difference is whether you do your editing in-camera [picture settings] and tweak them slightly later or change those settings on your computer.
If you get your in-camera settings [including/especially exposure] right in the first place you will see very little difference in the final output.
"With jpegs you are allowing the camera to choose a bunch of settings based on the manufacturers idea of an ideal image!" - Actually there are many settings you can change in the camera which have been set up by someone who quite possibly knows a little more about image quality than the average beginner, just a slight possibility mind you - which is why using RAW+jpeg gives you something to aim to beat.
You also have to ask yourself what you are going to do with the images. You will see comments like "If you print the two at 30X40 and put them side by side the image taken on a full frame with a prime in RAW mode will obviously be better!" Are you going to do that with your images and in any case will anyone know the difference between the two if they are not side-by-side? Do you have enough money to buy that 'difference' that you can only see side-by-side at 100%? A professional should obviously use the best they can afford but if you're a professional you won't need to have read this far because you will already know what you need. A 6 megapixel jpeg from a super-zoom could make a full page image in national Geographic - do you need more than that? If not then start with what you can afford, a dx camera body of any brand with a zoom lens is not so 'inferior' that you couldn't still get great images with it. As you improve and possibly buy more gear you can get 'better' lenses, a full frame body and a 'better' computer and you don't have to pick between them either, you can still use both zoom and prime lenses and dx and fx bodies. And of course you can usually shoot RAW+ jpeg with just about any body.

Since I gained New Zealand citizenship after moving from South Africa I often get asked the question "So which team do you support, the All Blacks [NZ] or Springboks [SA]". Since I have the luxury of not caring much about the sport or which country I am from I get great pleasure out of answering "Whoever is winning at the time". Now imagine if we could apply that principle to photography and simply support whoever provides us with a winning product rather then feeling the need to actually pick a side. I have Nikon gear at the moment and am happy with the fact that their sensors are pretty good in comparison [no names mentioned here] at the moment. But if Canon or any other brand were to suddenly produce a sensor with a clean iso 1 000 000 tomorrow I would grab it right away, because for my needs better iso performance is my only incentive to upgrade and I don't care who provides it. Being loyal to a brand or way of shooting is a narrow minded trap that could have you getting into arguments and making silly statements or hurling insults to justify your decision to spend time or money on a product - it's not your fault if another manufacturer provides something better after you bought a particular product.
In conclusion I will repeat that you don't have to pick a camp, if two products or ways of shooting each have enough strengths, and weaknesses to cause debates then the answer to "which" should I choose is generally "both".

Friday, May 6, 2016
Safer smoke bombs
How to make slow burning smoke bombs without any cooking.
I've been trying for a while to work out how to make a slow burning smoke bomb, for photographic effects, with the least amount of effort and ..... danger!
The last time I tried cooking Potassium nitrate, sugar and wax I turned the heat up a bit quickly ...... I'm still cleaning the wax off the garage floor and some of my hair still needs to grow back.

Most of the tutorials on making smoke bombs involve either cooking wax and stirring the ingredients in, or cooking the sugar and Potassium Nitrate mix to a caramel first, which results in a mix that burns furiously and is over in a short time [containing it properly can slow the burning down]. I wanted a controlled release so I have plenty of time to take pictures while it smokes away. Fortunately I found quick, safe way to do it.
Ingredients: 1.) Potassium Nitrate, 2.) sugar [brown sugar smells better] and 3.) [Citronella] outdoor lamp oil.

Mix 3 scoops of Potassium Nitrate, two scoops of sugar and a little more than one scoop of outdoor lamp fuel. More sugar will simply result in a bigger mess afterwards. The amount of oil isn't critical, just get the consistency that is good to work with.... basically that's it, you can light this mix and you will have a slow burning smoke bomb!

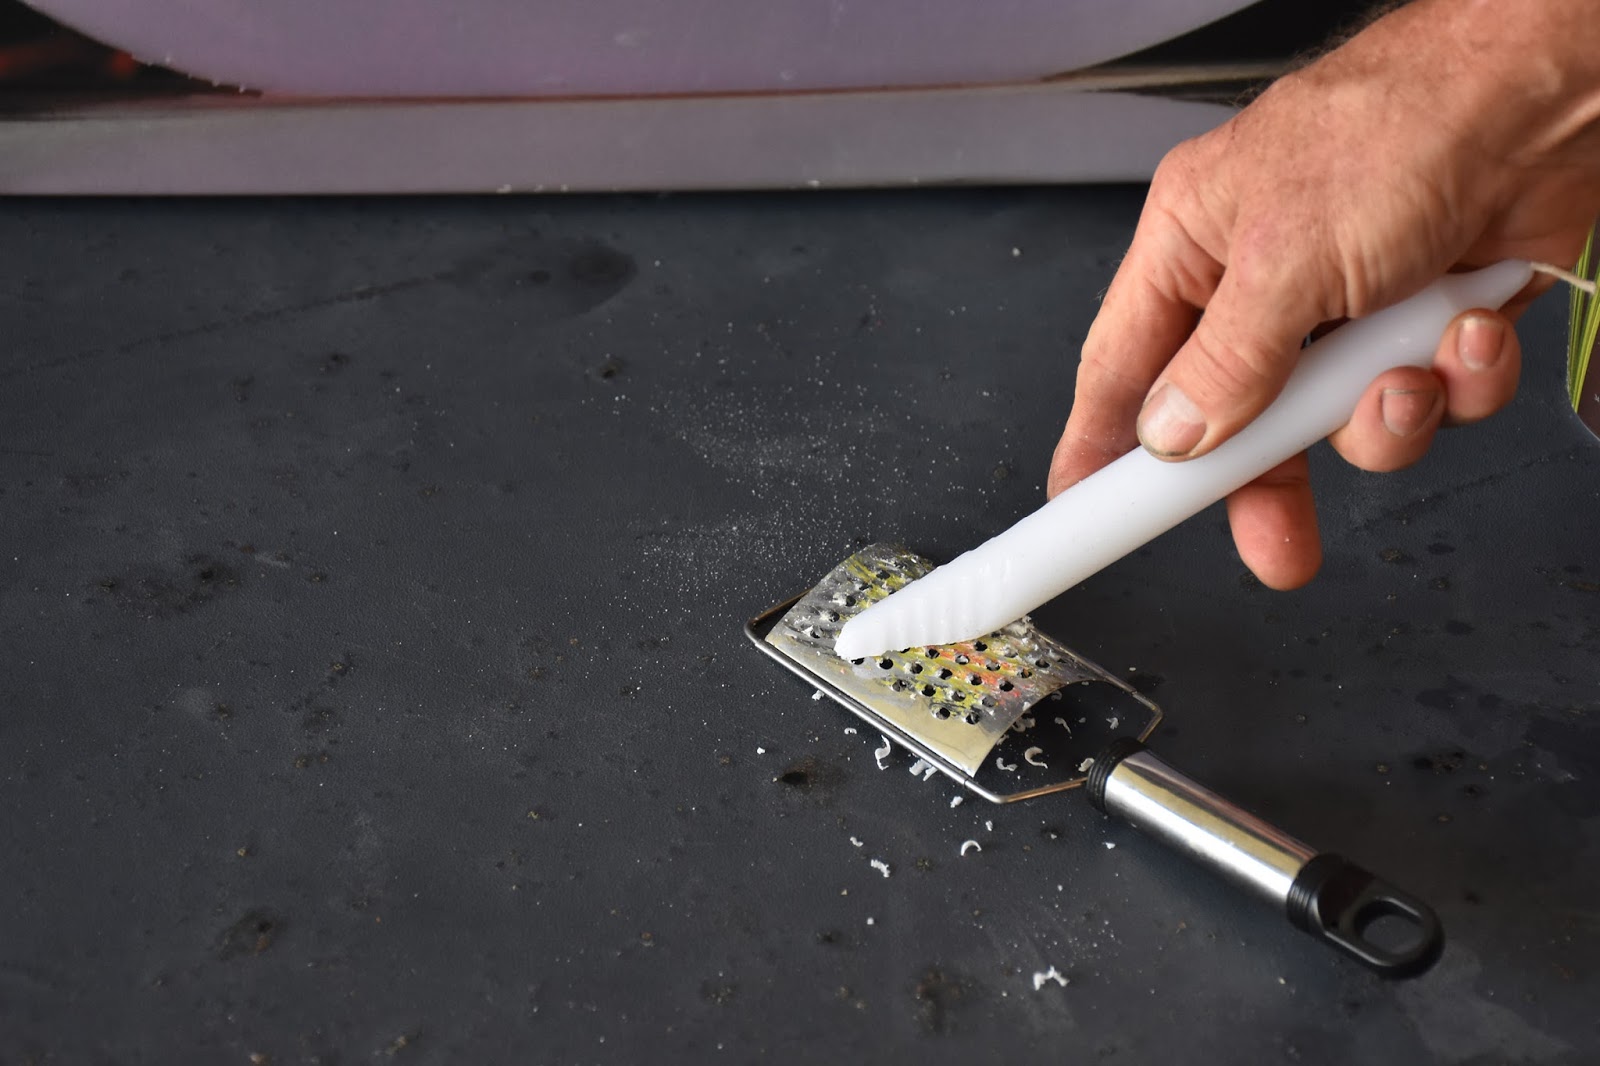
If you want to make it better you can add some wax. No cooking required still, you can simply get a cheese grater [maybe a potato peeler] and grate some wax into the mix which will slow it down further and give more smoke. Crayons can add colour as well if you wish.
Throw this into the mix and stir well.

I had some nice size cardboard tubing, I have yet to try it with a toilet paper roll, I'm not sure if it will simply burn longer or the same amount of time with more smoke. Cut some slits at one end of the tube.

Fold the pieces in and tape it up.

I'm a bit wary of the "grenade style" of smoke bombs just in case something gets caught on it and ignites it in my bag while I'm on my way to wherever I'm shooting. To make lighting it easier I simply pack the mix very tightly into the tube and push a match or two backwards into it, then all you have to do is strike the side of a matchbox on the match head to light it. This tube will burn for 3 minutes or longer.
I still need to try a few with a smaller opening to prevent it burning with a flame and make it burn longer.

This was a quick test burn of the mix, about a teaspoon of that mix burned for a minute.

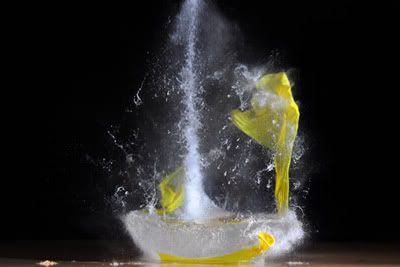
And a quick photo to show the effects that can be achieved with a little smoke in a photo.

This was from a previous shoot where I lit some cooked smoke bombs that burned out in 20 seconds and produced a lot of smoke.

This is another one that smoked out the whole area. I think a controlled release with wisps of smoke would have looked better.

This is how a cooked mixture of Potassium nitrate and brown sugar burns in a fire extinguisher.
My new recipe is not as impressive but gives me the results I want.
Saturday, February 6, 2016
Are manufacturers overdoing high isos? How about a clean iso 768 000 000 before we're happy?
The new Nikon D5 goes up to iso 3 280 000 and luckily competition means manufacturers will keep pushing the boundaries of high iso performance.
Many people have made comments in the past that nobody needs iso 1 000 000, and that "high iso's are getting ridiculous" in new cameras. I don't agree and feel that much of the opposition is due to fear of change. In 10 years when we have a clean iso 1 000 000 people who are born in that time would feel very limited by only having a camera with a clean iso 10 000.
Let's do some calculations, supposing that because many people like to shoot with their lens at its sharpest with a large depth of field around f11, and a safe setting for minimal movement is 1/1000th sec for most practical focal lengths we shoot with.
Let's go to an EV of -6. You're outdoors, nice clear night with lots of stars [in 20 years we will be discussing shooting landscapes on an overcast night and how far we can push the iso] and you want to shoot at f11 and 1/1000th sec, maybe catch a bat in flight by chance as well :)
EV-6 means f11, 128 minutes and iso 100, or 1 minute and iso 12800, 1 second and iso 768 000, 1000th sec and iso 768 000 000.
Manufacturers will continue to push the limits of high iso and one day, when we have a clean iso 768 000 000 who wouldn't embrace the prospect of going for a walk at night and snapping a few milky way photos without having to carry a tripod around. :)
At one dance event I shot with with my D40 at f2.8 1/125th sec and iso 800, 10 years ago.
Now if we had a clean iso 1 000 000 that could have been shot at f11 and 1/1000th sec.
Of course many will oppose that idea, some will even argue that they like having the blurred background that f2.8 yields - well they can still have that if they want while others can embrace the prospect of a large stage performance and being able to get everything in focus at f11 and 1/1000th sec when they want to. That's the beauty of it, you don't have to use it if you don't want to - just don't whine about it not being necessary because there are many of us would love to have a clean iso 1 000 000 - while we wait for the clean iso 768 000 000.

Thursday, November 26, 2015
I've finally written my book about the injured praying mantis that was my 'pet' for 6 months.
The Mantis story

The Mantis story

Subscribe to:
Posts (Atom)

