Bursting Balloons !

Bursting Balloons !
click on image for more

Sunday, January 31, 2010

Shutter speed .

Probably the easiest concept for beginners to grasp is shutter speed . If you use a slow shutter speed you can see the results right away - a bit easier than aperture and iso to understand .
Here are two simple images to illustrate the concept of using slower shutter speeds to your advantage .
These golf flags were being blown about by the wind
I took one at 1/800th sec to show what we would normally do to 'freeze' the motion .
I was in "S" [ Tv for Canon ] so I could select the shutter speed and let the camera decide what aperture to use to obtain the same exposure in each image . 


The camera selected F2.8 to let in more light to allow that shutter speed  at iso 200 .Note the shallow depth of field at F2.8 - the back flag is blurred .


Then I took another shot at 1/30th second to allow the motion to be shown . The camera chose an aperture of  F16 to block out more light so that the shutter could stay open longer for the correct exposure at 1/30th and iso 200 . At F16 we have a larger depth of field , the back flag looks more in focus than at f2.8 .

Now the two side by side : Which is 'correct' ? 
It depends what you want to do - show a sharp image of a flag or show the movement caused by the wind !
You can see the side effect of using shutter priority mode and leaving the iso constant . To get a faster speed we have to open the aperture up and lose depth of field - as we slow the shutter speed down and the aperture closes to counteract the extra light being let in the depth of field increases - keep that in mind when using shutter priority mode . 
These two images show one of the most popular uses of a slower shutter speed .
Moving water can look quite 'harsh' at faster shutter speeds .


While a slower shutter speed can make it look more relaxing ...


The moving water has turned into a 'mist' as it blurs with the one second exposure - allowing the same drops to move across the frame quite a distance rather than being frozen in motion .


Wednesday, January 27, 2010

Motion sensor camera remote hack .

These are my plans for modifying a motion sensor to trigger a camera via the remote .


First of all you need to find a motion sensor - of any sort , that either sends a signal or makes a noise . 

The infra red ones seem to work best , the ones with a small hole in them are not so good in bright light - Be careful that you don't buy one with a ''dummy'' infra red screen on the front only to open it and find it is the cheap version with a small hole next to it [ ask me how I know :( ] .
I bought this "passive infra red detector"  which is designed to work with an alarm system as a remote in a different room . 
A door sensor with a chime will do just as well and it should be easy enough to follow the wires to the chime so you know where to pick up a power supply from .


Now you open it up and throw away your receipt because there goes the warranty ..... I saw the "S  + - " and decided that must be the "Switch" output and possibly that little chunk of components is the wireless transmitter to the alarm system .


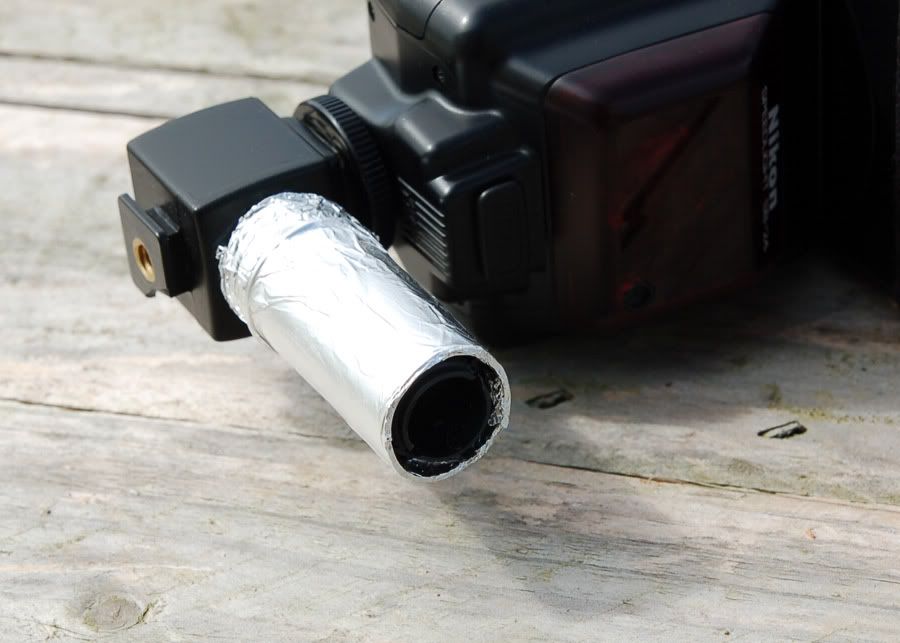
This is the business end of the wireless output of the motion remote .... apparently .


I tested that "S" wire and when the battery was connected , every time there was movement the red LED came on and I received a 9 volt feed there . I decided that it must be the output wire and so I un-soldered the three terminals , threw it away , and did something very simple ....


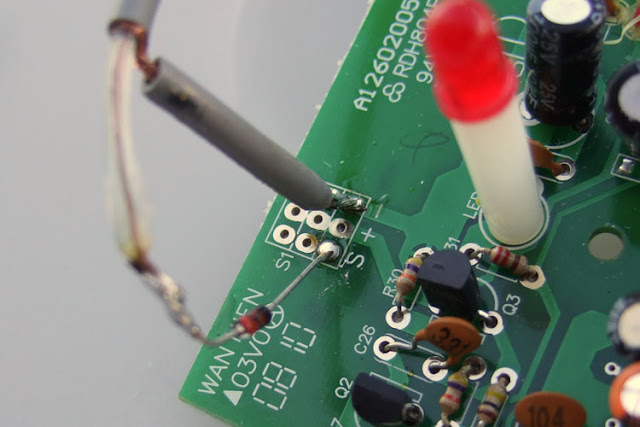
I took an earth feed from that "-" sign and since my positive output was 9 volts I fitted a 6 volt "zener" or 'avalanche' diode inline .
You must have the dark 'blocking' side of the diode pointing at the positive feed because if it is the other way you will get almost full voltage going to your remote which will fry it .

Now the remote : They all seem to work with 3 volt batteries so I selected a universal remote [ makes sense ] that will work with any camera ..... el-cheapo $16 ....


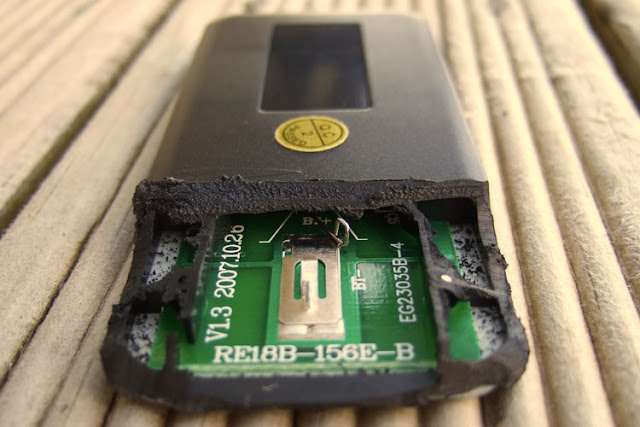
And the easiest way to get into the battery contacts was to grind the back away  . [ If you are a perfectionist you could make a 'dummy battery' with insulated surfaces and solder some wires to it so you don't have to destroy the remote ] . You can see the "B+" and " B-" inside the body of the remote .

   
As you grind the plastic wipe the lumps of molten plastic away from the sides and try to maintain your composure when the molten plastic does a 'flash meld' with your skin and your workmates are watching .

Now solder the positive feed to "B+" and the negative feed to "B-" [duh ] ........


Then slide a piece of paper between the contacts - apparently if a zener diode pops it has a dead short across it rather than going open circuit =  fried remote . 


These are the zener diodes I bought - I wasn't sure so I bought a selection of voltages .... 600 for $30 = 5c each . In the local electronics store they are 38c each depending on how many you plan on using of course !


Disclaimer !
I don't know how strong they need to be , 500mw [ half a watt ] has worked for me so far but I don't know if it will be better to get stronger diodes . Maybe an electronics geek can step in and offer some advice - I'm only an auto electrician !

But anyway , my little two way radio is only two watts so maybe this is strong enough .
Since I removed the wireless transmitter from the motion sensor I don't see much problem with the motion sensor not being strong enough - it's probably doing less work than before .

 It is really this simple : [ for how long though ? ]


 I then took the soldering iron and made an 'exit' for the wires so I could close the box again .... one way to stink up the house !


And the finished product ! The crazy thing is that the $9 module comes with a free $10 battery ?
 
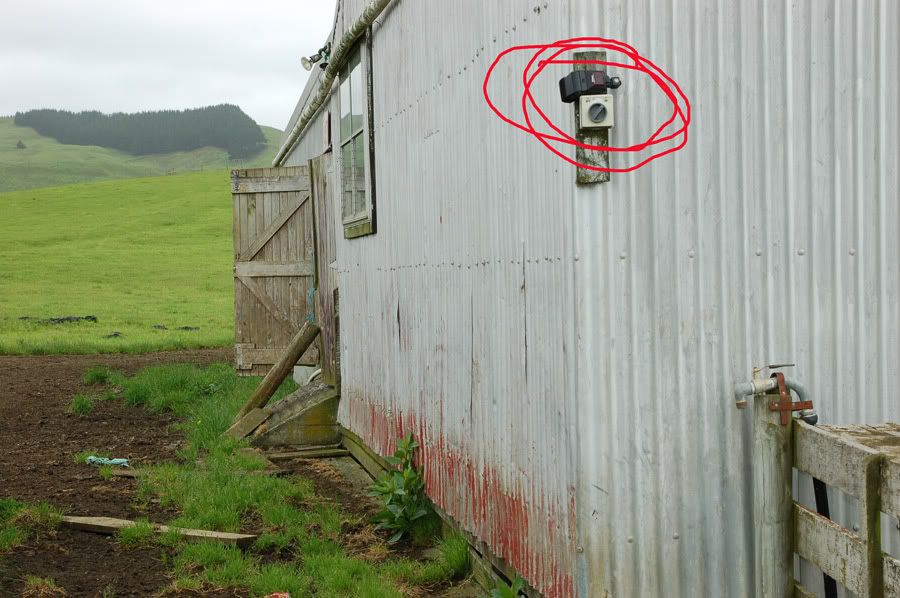
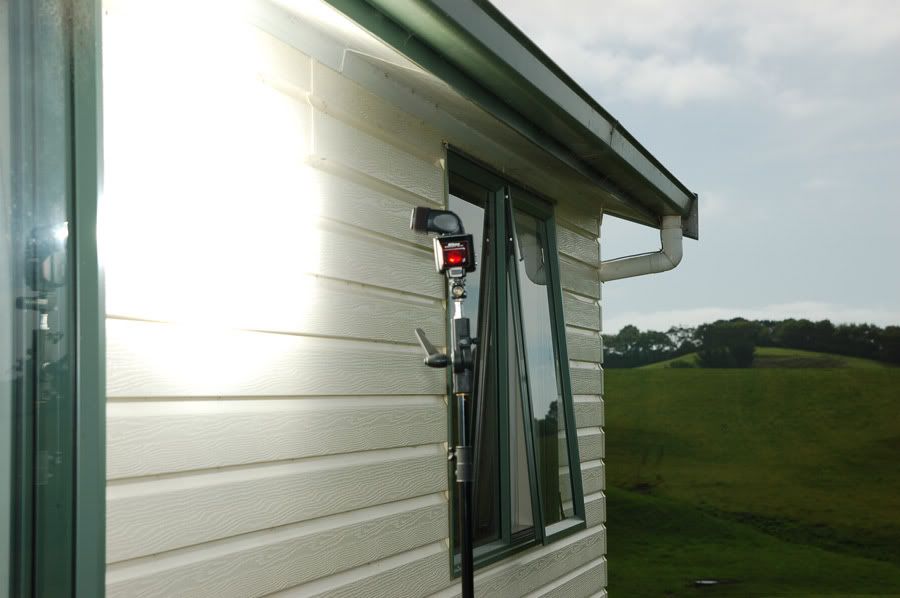
Now we go outside with it to try it out . I will find a better clamp to hold down the button for "Nikon" but this did the job for now . 
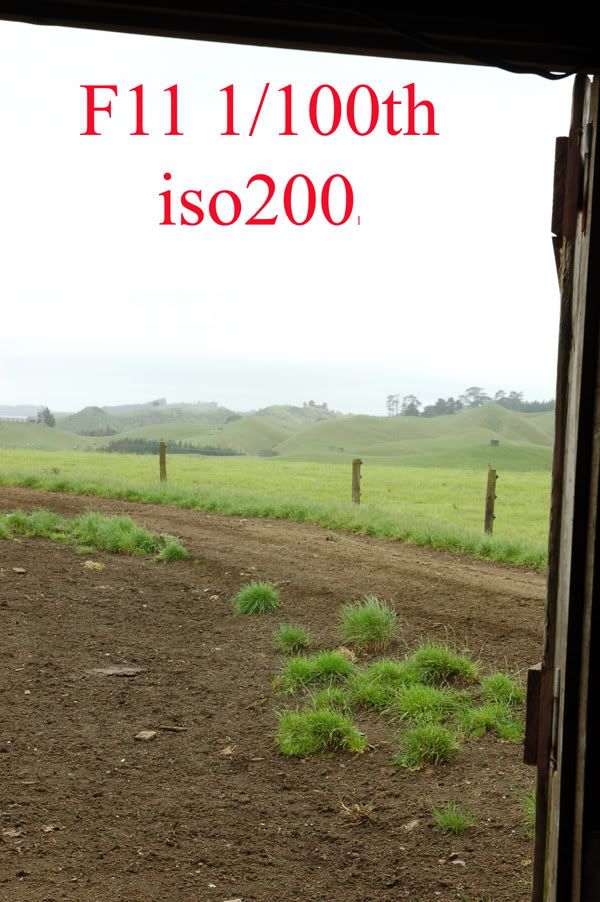
Set the sensor and remote up , camera on tripod , I set manual focus this time because I was working with one second pulses , and then moved around in front of the sensor ....

  { I would like to make a better holder in the near future }


The principle ? 
When the sensor detects motion it supplies a 9 volt feed to the "S" contact which used to trigger the wireless signal to the alarm [ could be a speaker in a door chime as well ] , that 9 volt feed goes through the 6 volt zener diode which 'wastes' 6 volts and lets through 3 volts to the remote . Since the remote button is being held down it is ready to fire as soon as the battery supply gets a feed . 
 
The motion sensor I bought has an added advantage in that it has a 'test mode ' . If the battery cover is off it sends a one second pulse each time it detects motion which is why I had my camera on manual focus for these tests . When you fit the battery cover a switch is held down which de-activates the sensor for 60 seconds and then after that each time it detects motion it sends a signal for 55 seconds which would give the  possibility of having your camera in auto-focus mode and 5 frames per second [ or whatever your camera can do ] and let it focus and fire away when a subject enters the frame . [ I'm thinking wildlife photography here ] .
BUT : I haven't tested the system at 55 second triggering times , I don't know how much this zener diode can handle - time will tell . There is the option of simply using the power supply to switch a solid state relay interrupting the remote battery supply but that would just about double the costs :) .

For now the one second trigger times will do the job for me , there's a hawk living in the trees nearby , now all I need is one of those possums on the side of the road .........

As mentioned these plans are free to use , I tried setting up 'asdsense' to let advertising sponsor my research but it is taking a long time to happen so there is a donate button at the bottom if you feel that way inclined . Any proceeds will go toward replacing the gear I have destroyed so far and buying more things to hack into for photography [ as with my sound activated flash trigger ]  


I see other possibilities as well . There are "driveway alarms" that consist of two units , one in the house and one outside giving the possibility of having your sensor in one place and your camera quite far way in another place triggered by that remote sensor . Perhaps the remote sensor by the finish line of a race  with a 'snoot' to direct the pickup as to exactly where you want your subject to be when it fires the camera - you would have to calculate the time delay as well since it isn't instant .  
I also see possibilities for weddings where "clicking" and "flash" aren't allowed - a compact in 'museum mode' tucked away somewhere .
These things would cost a lot of time and money to manufacture especially but they're sitting on the shelves for $9 waiting to be modified ! Just be careful what modifications you make :) my old remote didn't like 9 volts !

Monday, January 25, 2010

1/4000th sec wireless flash synch

I must admit I was surprised by the results . I knew the optic trigger was obviously triggered at the speed of light but never knew how long it took for the flash to respond to that trigger . I used some 'special camera gear' , the D50 with its electronic shutter , two SB24's and an optic trigger .

I took a walk on the farm to find some 'different' scenery .


Set up the SB24 on this old shed ....


And the flash wouldn't trigger at more than 30cm away - the ambient was messing with the optic trigger so I went indoors and shot out the door so I could still have some ambient to play with .


I opened the aperture and increased shutter speed to darken the background and give me 1/4000th sec .


After playing around a bit because 1/16th power was too much at F2.8 I eventually bounced the flash off a wooden door to weaken it a bit .


Then I headed home because I could see the cows had the same idea .


The sun was coming out and I wanted to make the optic trigger work outdoors and so I put a tube around it - it still wouldn't work properly until I realized the foil was reflecting too much ambient into the tube so I pushed a black tube into it and this got me 4 metres working distance in sunlight .


I went for 1/4000th again


and eventually struck a happy medium with F7.1 , 1/4000thsec and 1/4 power flash ...


Not 'perfect' results but now I know what my limits are['nt] with off camera flash and the D50 !


Weddings for "soon to be 'ex' " friends

"My cousin was impressed with my pictures of mountains and the cat , now he wants me to photograph his wedding ! I have a professional camera so the results should be good  .... should I buy a flash ? "
That's how many questions start on the forums and they often end with " look , I never asked for a lecture on life . Why are you people so unfriendly , I'm going elsewhere for advice ! ".

Wedding photography is a very serious occupation and there are many professionals out there who are very passionate about couples getting the best memories of their wedding possible - because you only have one go at it .
They have also all experienced or heard of horror stories with regard to messed up or lost wedding photos , broken friendships with the person that made the mess , people being sued to pay for another wedding to get the pictures right this time ..... need I continue ?

So if you ask a question like that you will quite understandably be upset by the pro's going into 'attack mode' telling you not to do it , when that wasn't the question you asked , but they are actually trying to protect you and the couple involved .
Wedding photography is a whole different ball-game in photography and whether you like it or not you will get a lecture in life if you ask 'that question' . If you can't handle the replies you get that probably means you can't handle the stress of wedding photography either .
Many pros work with a lot of rich people and can't comprehend the other 90% of the population [ in various countries ] that can't afford $2500 for wedding photos , so they will tell you not to do it under any circumstances .

Ok , now we've got that out of the way and you are still determined to do it ... you followed the well meant advice on the forums and insisted that they get a professional photographer , they told you they can't afford one and if you don't do it they won't have any pictures . You went back to the forums and were told to force them to borrow money for a pro - so they asked you to lend them the money :(  ........... ok , now you can photograph their wedding but you must be totally sure there is no other way !


1.) My first bit of advice would be to find a second , and even third , photographer who also wants to gain experience [ there are plenty of people out there wanting to have a go at weddings for free just for the experience ] . This will be your insurance - two other people taking pictures at the wedding .

2.) Next , how far away is the wedding ? if it is a few months then learn all you can about your camera and get a flash if you don't have one , ask questions on the forums , post pictures , get advice on how to improve ....... BUT :  Only photograph the wedding in the modes you are used to shooting in !
If you are used to driving an automatic car and want to enter a race in a week don't let anyone talk you into driving a manual because it is 10% faster than an automatic - you can make bigger mistakes in manual if you are not used to it , even though someone who is used to it can get better pictures .
If the wedding is one week away rather shoot the entire wedding in program mode , " P " for "panic" [ But you tell the customers it is "P" for "professional" ! ] , and get 500 average pictures than shoot in manual , get 5 really good pictures - and forget it at those settings and then get 495 really bad pictures because the lighting has changed . 


3.) Never try anything new at a wedding ! You don't do a major hike in the mountains with new boots - you'll get bad blisters , you don't hire two professional cameras you have never used the day of the wedding either .

Don't let someone talk you into hiring professional cameras you don't know how to use - rather shoot the wedding with two entry level cameras you know how to use than mess up with pro cameras just because someone thinks that a solid body will give better results - seriously the Nikon D90 has better image quality than the semi pro D300 and I have seen people suggesting to someone they hire D300's rather than using their D90 .... because they are semi-pro bodies ???? The couple will never know the difference in the pictures [ actually the D90 pictures will be slightly better ] but they will notice if you mess up horribly with a camera that you don't know how to use ! 
Will the stronger body give extra protection or make you over-confident in its ability to withstand knocks ?
Maybe you should also hire a rally car with a roll cage to drive there - even though it uses twice as much fuel and you don't know how to drive it ? It can handle the knocks better than your reliable Toyota .... then again they can still both only do the speed limit and you know how to drive your Toyota so are less likely to crash ! 

I heard a horror story of someone who heard that manual focus can get better pictures - so he tried it at a wedding ....... I was told that 15 of the 900 pictures were actually in focus .

4.) If possible have two of everything , two camera bodies , two lenses , two flashes  , plenty of  backup memory cards - It's like mountaineering, if you expect everything to go wrong  and plan for it you will be pleasantly surprised but if you expect everything to go perfect you will only be disappointed .
Oh yes , take spare clothing as well [ and don't wear bright red undies :( ] Two weddings ago I split my pants and luckily[?] managed to borrow some bulky plastic rain pants from the gardener .


5.) Your primary objective is to capture memories - not to try and impress other photographers ! If a picture doesn't look like it will win a competition then simply don't show it on the forums - but it may well turn out to be the couple's favourite memory of the day .

6 .) Don't obsess about image quality and staying at iso 200 , if the light is bad then a sharp picture at iso 3200 is better than a blurred picture at iso 200 , they'll probably think the noise is artistic anyway . " You can fix noise but you can't fix motion blur " .


7.) Don't feel you need to buy new gear for the wedding . It's a natural reaction when you start to doubt your abilities and think that buying a new lens or camera will fix that . There's nothing wrong with buying gear you have needed for a while but don't let anyone talk you into buying a flash bracket or other item you have never used before - only to find it's not what you expected on the day .
If it's a few months from the wedding fair enough - if you have time to practice with it , but you don't want a second hand lens arriving two days before only to find after-wards that it had a focusing problem which is why it was sold ..... only use what has proven itself in the past !


8.) Added from the comments section below , quote from "Adam" :
As a suggestion I would also consider a contract. Not so much for liability purposes, but to hammer home that "I could stuff this up".
Many people think that you're just been humble when you say you're not a professional and may not get good photo's. When they see a piece of paper - most then then get a revelation that you are serious.
Also - another good reason to have 2 or 3 photographers is that there is no '1' person at fault, when they don't get the same sort of images that "their friends with the pro" got, and you're not the 'bad man' all out on your own.


9.) Organize the group shots to start with the biggest group [everyone together] and whittle it down from there otherwise you will waste a lot of time gathering people together , suggest that right after the ceremony [ depending how it goes ] they all sit/stand still for one group shot before everyone gets carried away hugging and kissing and congratulating the couple .
Try to arrange for the couple to have someone with the list setting the groups up for you .

10.) Take a few shots , at least three , of each group - using a tripod if possible - in case you need to do a head swap if someone blinks a lot , or simply filter through the images and select the one good one. It's much easier to delete a few images later than try to do something with only one group shot where someone's eyes are closed. 
Take more shots for bigger groups where more than one person may be a 'blinking blinker'.

11.) This one is important : Have a plan !
Scout out the location of the ceremony and ''gardens''[?] for the formal pictures . Find at least 4 nice spots where you can plan what you want to do . Write some poses down on a piece of paper .
You can always get some casual shots in between locations but it's very hard to 'make things up ' on the day .
Have a look at my "wedding poses for inspiration" and feel  free to add suggestions there . I keep it mainly to refresh my memory .

12.) When you go hiking in the mountains it's easy to forget that at the end you will have a pile of rubbish that will need to be put somewhere to carry it back .
Well , as you progress through the day you will start to accumulate memory cards that will need to be stored somewhere VERY SAFE . Have an empty pocket or case of some sort where you will put the full memory cards knowing that they are separate from the empty ones .
These memory cards are worth a lot more than a new one in the shop - they could be worth the cost of paying for another wedding if they get lost !

13.) Arrange for rest time during the formals . Once you have the group shots done and take the wedding party off for some formals and fun shots set aside 'rest time ' , tell them that there will be 10 minutes here and there where you will all sit down and recover , check camera settings , look at your notes for inspiration from the poses you have written down and ... rest .
Everyone will be pretty tired by now and will appreciate it.


14.) Don't think of arranging shots after the speeches or reception .... once the couple sit down and start talking with friends and family [ two separate categories ?] they don't want to do anything more - they are tired . Perhaps though , you can talk them into one ''mock cutting of the cake" to get that out of the way before you take a few shots of the dancing and slink off into the shadows ..... 


14. Flash : [ I mean use a flash on your camera !] .
The main concept of good flash is : " Less is more " meaning that you should rather dial down the flash power to make it harder to see flash was used then blow their eyeballs out of their sockets with flash that is too strong . Even in an emergency the built in flash dialed down to "-3" can make an image better by adding catch-lights to their eyes while still making it hard to tell that flash was used .
If you have an external flash then bounce the flash whenever possible , off walls , off the ceiling - anything rather than direct flash . If you are outdoors and there is nothing to bounce off then direct flash is the only way , just dial it back .
Something like "TTL/BL-1" [ ETTLII -1 if you shoot Canon ] in bright sunlight and "-3" in overcast weather ... and everything in between .   


15. So how many images do you hand over ?
many pros will tell you not to hand over more than the best 300 so that other photographers will not be able to pick out mistakes you have made , they also say that more than that is too many for them to look through .
My thoughts are that they have the rest of their lives to go through the images and I don't care what other photographers think about technical issues the couple won't notice , so I hand over as many as there are , deleting only blurs and duplicates and the occasional bad facial expression or blink .
I want to impress the couple not other photographers , and why should I delete their memories ?
At the last wedding I handed over 1500 images and they were delighted especially with a the few that I had thought of deleting because of a persistent 'problem' with the groom's tongue sticking out like a cat .... the bride loved those shots .... if she didn't they could just delete them :)  

16. Details : Don't get 900 pictures of the bride and groom only . When things are moving slowly look around for details that will be a reminder of the day . Get shots of the rings , her shoes , the dress , the table decorations - make them different from normal snapshots .
[ Think you need a fancy camera ? This was taken with the 'old' 6 meg Nikon D50 - the 85mm 1.8 lens was the secret weapon ]


17. Want something 'different' ? Occasionally I do a slide-show so they can see the pictures of the day right at their reception ! Most pros would recoil in horror at the thought of people seeing their un-edited images but nobody notices the mistakes , the screen quality is normally not good enough to show the mistakes anyway and the "Ooooh"s and "Aaaah"s give a good indication of what pictures the people like .


18. Once a bride told me beforehand that she was very self-conscious and doesn't like too much attention directed toward her . I told her that I would have a talk with the groom and if I noticed she was feeling uncomfortable I would joke around with him to direct attention away from her .
I discussed this with him so he knew why I was making jokes with him and he played along quite happily .
Now I do this with every couple - I tell each of them that we will make jokes amongst each other to ease the situation , that way neither gets offended by my weird sense of humour and they feel that I'm doing them a favour when I joke around .

19. Know how to use your camera , don't rely on auto settings that you do not understand . Use only one focus point . At one wedding my second shooter had a fancy new camera with 45 focus points . She left the focus mode on 'multi focus mode' which uses all of the focus points .
There were some pictures of the bridal party in the back of a limo and the one girl closest to the camera was in focus - the rest were out of focus including the bride in the centre of the frame .
The 'multi' focus mode with all 45 focus points active chose the closest focus point and messed up a series of images with an out of focus bride - the main subject supposedly .
Some cameras offer the possibility of using all of the focus points while being able to select which one is 'active' - just be sure you know which focus point the camera will use !


My thoughts on the friendship part is that if my friends can't handle the situation if it goes wrong after being told the risks then I thank them for showing me that they aren't real friends and move on with my life - many others will not feel this way though so it's up to you whether you go ahead with it now or not.

That's all I can think of for now - I'll update this as I think of other advice I can add :)

Saturday, January 23, 2010

Auto iso and flash .

Many people think that auto iso stops working as soon as you turn the flash on .
Basically it keeps working , but only for the flash . It stops working for the ambient .
{"Ambient" is basically any light that isn't flash .} .
I set up a few pictures of "Stinky" watching a movie - the computer screens and curtains in the background help to show what happens with the ambient when the flash is turned on .
First of all here's a picture with no flash taken on a tripod at f11 . I chose iso 200 and left auto-iso turned on the whole time . Auto iso went up to 3200 because I had 'minimum shutter speed' set at 1/125th so auto iso went as high as it could before dropping the shutter speed .
Look at the computer screens and the outside light on curtains as the settings change .


Now watch what happens when I add a flash . I used direct flash on the subject to emphasize the changes in the background . Look what happened to the outside light on the curtains and the laptop screen .
Since I had the iso set at 200 the camera was happy to leave it there because now the flash metering has become the priority - it no longer cares about the background - only the subject , and iso 200 was enough for the flash system .

Now we tilt the flash head to get better lighting using bounce flash .


Now when we use bounce flash we are suddenly wasting a lot of energy in all directions to get more natural looking light . The light has to travel much further and it is being diffused in all directions meaning that we need more power to light the subject . Since I chose F11 , when the camera does a pre-flash and gets its reading it realizes that it doesn't have enough power to effectively light the subject and be ready to fire again in a hurry . [ It doesn't necessarily wait till it needs more than full power before making the decision to increase the iso ] .
In this case it decided that iso 200 would not do the job and so it pushed the iso up to 900 - auto-iso does work when you use flash ..... but only for the flash metering .


Now , as a side issue , bounce flash has made the lighting look more natural but there are nasty shadows on the subject's face so we need to get a little forward light as well . We do this by pulling out the bounce card . { a business card held on by a rubber band will do the same job .}
This throws some light forward to light the shadows .


That's better !


Now we have that out of the way what about auto iso when you have chosen a higher iso ?
Just to prove the point , something you may never come up against but is good to know , I set the iso at 1600 and took a direct flash shot of the subject again . Auto iso pulled it back from 1600 to 1000 because at F4.5 and iso 1600 the minimum working distance was 8.3 feet and I was closer than that !


So remember to keep this in mind . When you use flash have a look at the distance info on the back [only if your flash has it of course ] .
When I had the aperture wide [ F4.5 ] and the iso at 1600 with direct flash it told me the maximum working distance was 66 feet . But : Never forget the minimum distance as well ! It is telling me my minimum working distance is 8.3 feet -even  if it fires at its weakest anything closer than 8.3 feet will be too bright ! Always remember to keep your minimum distance in mind !  


So even though it often doesn't look like auto iso is working when we use flash it is still doing its job for the flash metering system . Many people would actually like it to work for the ambient as well so hopefully the manufacturers will do something about it . Using "slow synch" doesn't get auto iso working either - it just makes the camera forget about the lowest speed you set auto-iso to work at and drops to the shutter speed it needs to expose the background correctly no matter how slow it is .

03/2010 : I read a statement recently that the new D300S works somewhat differently and also adjusts iso for the ambient so  perhaps this will be changing in all Nikon's in future ?


Thursday, January 21, 2010

Exposure : Described by "blumesan" of 'photocamel'


EXPOSURE:
In photography, exposure is defined as the total amount of light allowed to fall on the photographic medium (film or sensor) during the process of taking a photograph.

Now we have learned that adjusting the size of the aperture and the time of the exposure (the shutter speed) are the basic tools which allow us to control the exposure. However, even if it seems quite obvious, it is worth emphasizing that the primary factor in determining exposure is how much light is illuminating (and being reflected from) the subject we wish to photograph. Aperture and shutter speed are then used to control how much of that light eventually reaches the film or sensor.


I mention this right up front because one will often read that the "exposure" of a photo was, for example, "1/250 sec. at f/8.0". This meager data sometimes confuses beginners. You should be very aware that, without some further information, these numbers, by themselves, don't give any real information about exposure. To convey even a rough approximation of exposure, the information must include, at minimum, some clue to the lighting conditions under which the photo was made. Was it a bright sunny day, a dark cloudy day, or in a closed room illuminated only by candlelight? 


Therefore, when you need to choose a suitable combination of aperture and shutter speed, you must first determine the how much light is available. The old way to do this is by eyeball; perhaps not very precise, but when trained by experience it worked pretty well; (see the entry about the "sunny 16 rule" [at the bottom of that page]). Fortunately the fact that almost every modern camera contains a built-in sensitive instrument to measure the light (commonly called the exposure meter), relieves us of this task. Even better, many cameras made in the past couple of decades contain sophisticated mini-computers which, in conjunction with the exposure meter, will calculate and set the shutter speed or aperture, or both, with no intervention on our part.


If you are content to always let the automated camera make all of the exposure decisions for you, then you probably don't need to read much more of this section. The remainder is written for those who, at minimum, wish to know a bit more about how and why the camera automatically adjusts the exposure the way it does. It will be particularly important to those who want to take an active part in controlling the exposure parameters themselves and need to know what advantages are gained by so doing.


Exposure chosen by camera blew out highlights in the snow  .

 
Adjusting exposure to retain detail looked more true-to-life even though the camera meter registered -1 under-exposure


The first subject that needs to explored in just a bit more detail is aperture. You may have already read that the size of the aperture is designated by a rather strange set of numbers, and that the smaller the number, the larger the aperture. If you are having trouble getting your mind around this curious convention, it will make much more sense if you always think of the aperture number as the denominator of a fraction (the number that is on the bottom of a fraction). So if you are comparing, for example, F4 with F16, think of these values as 1/4 and 1/16. It should then be very clear which is the larger aperture.
Next let's consider the set of values that you might find on the aperture ring of a typical lens. (For those who may have a lens without an aperture ring, stay tuned; we will discuss that later).


2.0 | 2.8 | 4.0 | 5.6 | 8.0 | 11 | 16 | 22


The smallest value on some lenses may be less than or greater than 2.0 (more about that later); and you may run into a few lenses where the largest value is more than 22. 


The most important feature of the above series of values is that each value represents an aperture that is exactly one half the area of the value immediately to its left, and therefore allows exactly one half as much light to reach the sensor. And, although it seems really obvious, to hammer home the point observe that: if you read the series from the right to the left, each value represents an aperture that is double the area of the value immediately to its right. In the jargon of photography moving from one value to the immediately adjacent value is known as a change of "one stop". Said another way, changing the aperture value by one stop means halving or doubling the area, and thus the amount of light allowed to reach the sensor.


Note that throughout the preceeding paragraph I have written the word area in bold face type. I did this to stress the idea that the exposure (the amount of light reaching the sensor) is directly proportional to the area of the aperture rather than the aperture diameter. However the rather curious series of aperture values listed above are computed directly from the diameter. (For those who are interested, the math involved in converting diameter to area results in this unintuitive sequence of values represents a doubling or halving of aperture area.) In any case it's worthwhile to become familiar with this series. If you can remember just the first two values, you can construct the rest of the series by doubling the value two places to the left. (i.e. 2 x 2.0 = 4.0; 2 x 2.8 = 5.6; etc.)


Now, for those with inquiring minds, I want to expand a bit concerning the above series of aperture values. In my collection I have four lenses each of which has, as its initial aperture number, a value less than 2.0. These values are: 1.4, 1.5, 1.7 and 1.8. Only one of these values, 1.4, represents an aperture that is exactly a one stop larger than 2.0, and thus fits the criterion of the series. The other values are a result of the manufacturer producing a lens whose maximum aperture is larger than 2.0, but not twice as large (in area). So if you have such a lens, keep this in mind. The aperture values that follow these odd values are exactly the same as shown in the series above. I have another lens whose initial (lowest) aperture value is 3.5. The next highest value that can be set is 4.0, but there is nowhere near a one stop difference between these two apertures. So, as a general rule going from one aperture value to the next usually represents a one stop change (doubling or halving) of exposure. But like every rule there are exceptions. Fortunately these exceptions, when they occur, are confined to the initial (smallest number) aperture value.


Speaking of exceptions, if you have a modern digital camera where the aperture value is set using a dial or other control built into the camera body and displayed on an LCD panel (as opposed to using a ring on the lens itself), well you can throw this rule out the window. Most such cameras allow you to choose the increment, when going from one aperture value to the next. You may set the camera so that the interval is 1 full stop or 1/2 stop, or 1/3 of a stop. So, if a one stop change doubles or halves the exposure, how much does 1/2 stop change the exposure? That's a tricky question; for now it's enough to know that the change is less than that of a full stop.


Next we discuss the second variable that allows us to control exposure: shutter speed. If you were to examine an older camera, you would find a control dial showing something like the following series of shutter speeds, in fractions of a second:


1/15, 1/30, 1/60, 1/125, 1/250, 1/500 


What you should note is that each value in this series reduces the time the shutter is open by one half, and therefore allows exactly one half as much light to reach the sensor. This corresponds exactly to the series of aperture values listed above. The result of this relationship is particularly convenient when, for example, you know the correct exposure is F8.0 at 1/125 sec, but you wish to use a faster shutter speed (e.g. when subject is in motion). You will achieve exactly the same exposure if you change the shutter speed two steps, to 1/500 sec. and change the aperture two stops in the other direction, to F4.0.


Modern digital cameras control shutter speeds electronically. As a result you will find that one can choose from a much finer spectrum of shutter speeds where the intervals are smaller than a doubling or halving of the adjacent setting. To maintain the convenient correspondence between aperture and shutter speeds, those cameras that allow you to choose the interval between aperture values will automatically set the same size interval between shutter speeds. This means when you increase the shutter speed by two "intervals" you will achieve the same exposure by changing the aperture by two "intervals" in the other direction.


Terminology: I have stated above that the traditional unit for a change in aperture that results in a doubling or halving of exposure was a stop. Very strictly speaking this term was restricted to aperture changes. The traditional unit for a change in either aperture or shutter speed that results in doubling or halving of exposure was a step. However many respected authorities have used both terms interchangeably. Modern terminology, and that used in most camera manuals I have seen, introduced a new term: Exposure Value (EV). The meaning remains the same. A change in EV of one unit denotes a doubling or halving of exposure. Thus your new camera may give you the option of setting the interval between adjacent aperture values, shutter speed values, and also ISO values (to be discussed later) to 1/2 EV or 1/3 EV.


To recap, we have learned that the first variable which affects exposure is the amount of available light. Next we have the aperture and shutter speed which control how much of that light reaches the sensor. There is one additional variable which, while it does not control exposure per. se., it does determine how the sensor responds to light. I am referring to ISO, a value that describes the sensitivity of the sensor. The greater the sensitivity, the less total light needs to reach the sensor to produce a properly exposed photograph. Film is manufactured with a range of ISO values, but once you put a roll of film in the camera you were stuck with that ISO value until you changed film. Digital cameras allow us the luxury of changing the ISO (the sensitivity of the sensor) from one shot to the next. The ability to increase the ISO allows us to get shots where the available light is meager and we have already maxed out the exposure with the aperture and shutter speed controls.


F2.8 , 1/125th sec , iso 1600
Also see "Exposure explained by Damien of nikongear.com "