Bursting Balloons !

Bursting Balloons !
click on image for more

Sunday, February 28, 2010

Flash : Diffuser dome and "spread" tests

I decided to do some comparisons between normal direct flash , then with the diffuser dome and with the wide angle diffuser .
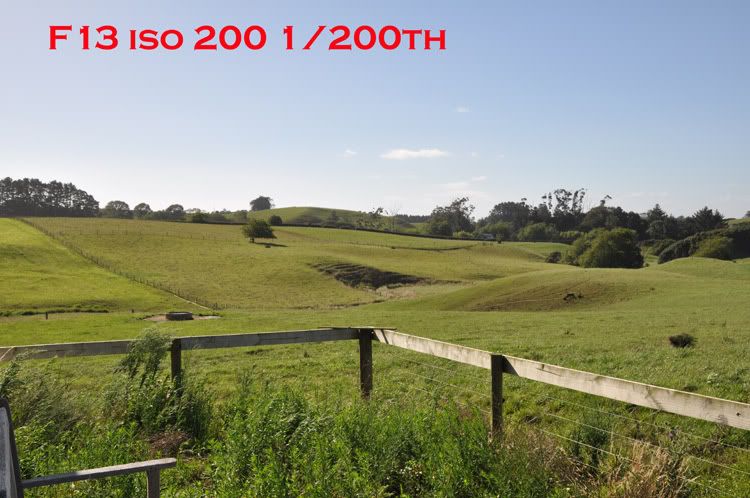
When I set the lens to 50mm and set iso 200 , 1/200th sec and F11 [ A good 'average' setting for a sunny day with a bit of haze ] the flash tells me I have 5.7m working distance which is actually the maximum distance it could fully light the subject , just as fill flash you could probably double that distance .

This is the flash pattern at 50mm zoom and 1/16th power .


With the diffuser dome fitted the camera tells me I now have 2m working distance which equates to 1/8th of the original flash power actually hitting the subject . This is its pattern .


Then with the wide angle diffuser out we have 2.5m or 1/5th of the original power which is a bit better than the diffuser dome - and this is its pattern .


In my mind it would be better to use the wide diffuser when firing into an umbrella .
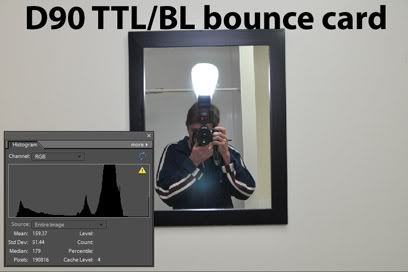
With indoor flash you would be working with wider apertures and letting in more light so I suppose the diffuser dome would have its uses there since the light going sideways will add to the exposure when it bounces .
I don't see much use in having the diffuser dome on outdoors since just about everything that hits the subject will be direct light anyway so direct flash when using fill makes more sense to me - and the diffuser dome will use 8X the battery power for the same lighting .


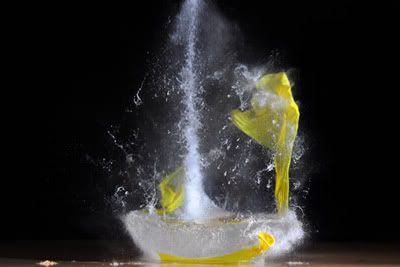
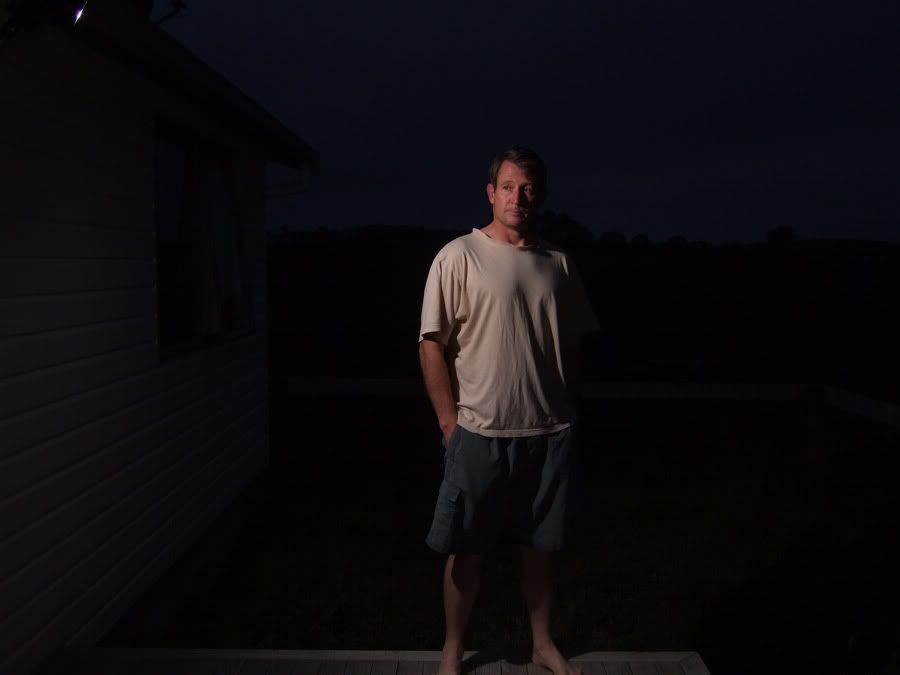
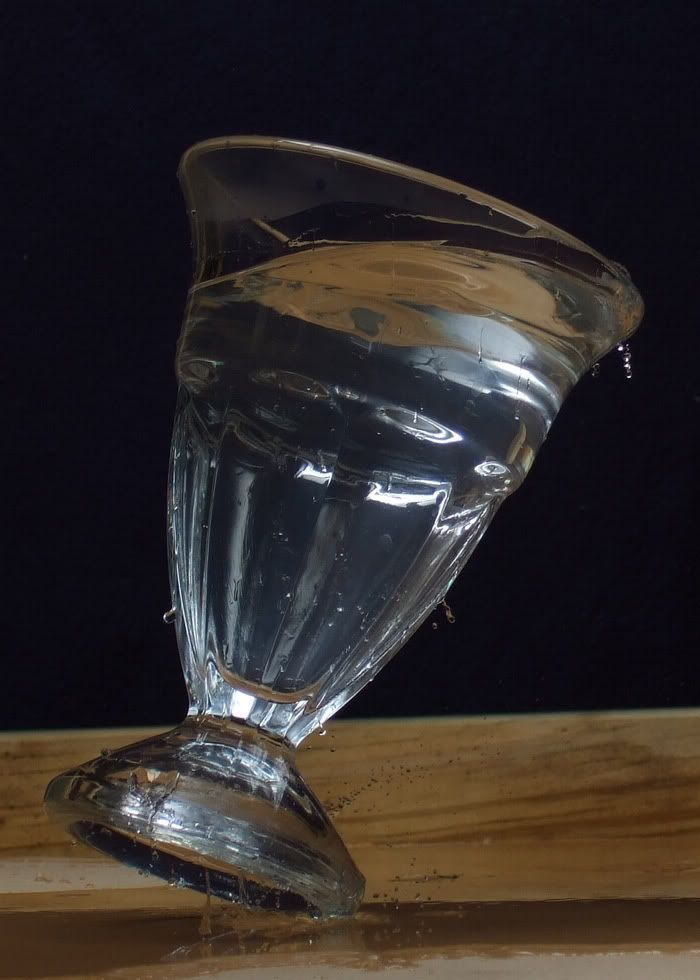
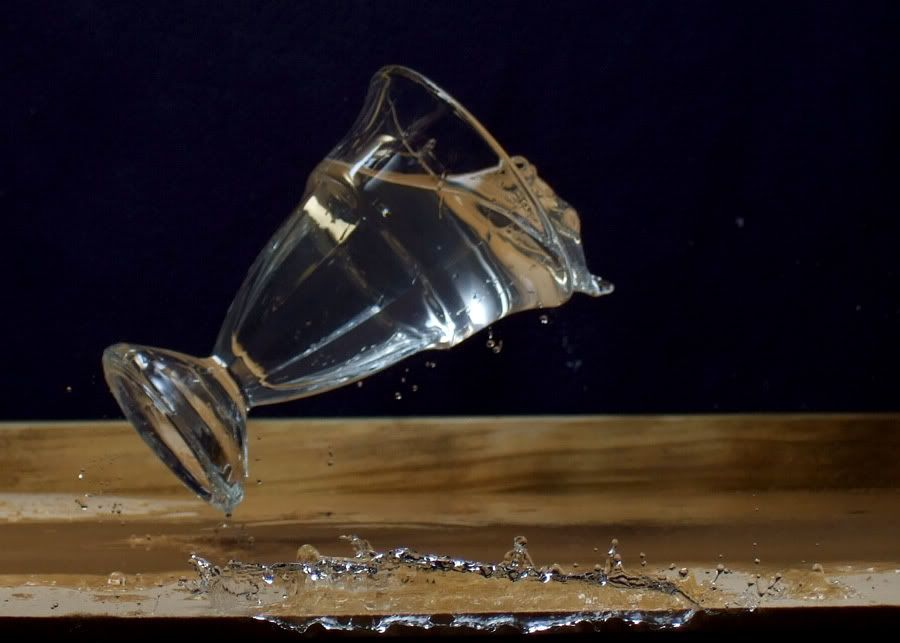
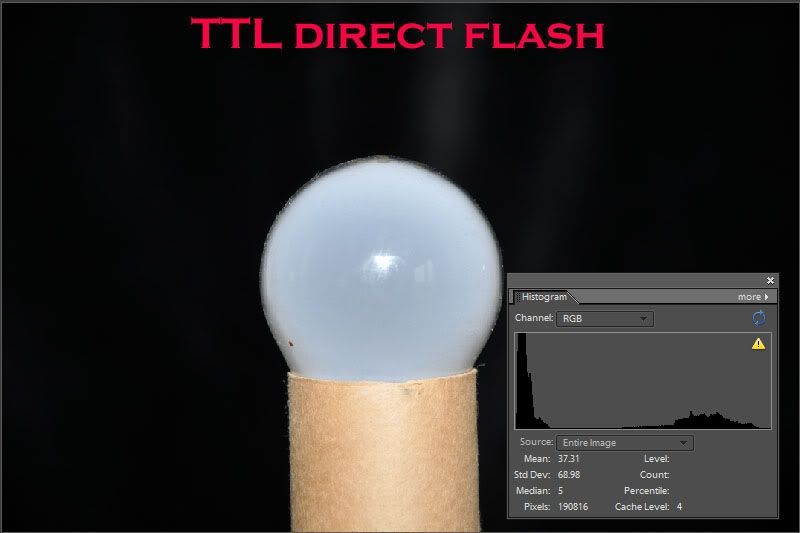
Now have a look at this comparison . This afternoon I decided to see how much of the flash power is wasted outdoors with nothing to bounce off . I fired the flash at 1/500th and F14 with my D50 and the Yongnuo 602 kit mounted on my D90 - the second shot was at F25 .
I had the lens on the test camera fully framing the sideways calendar - anything outside the calendar is wasted flash .
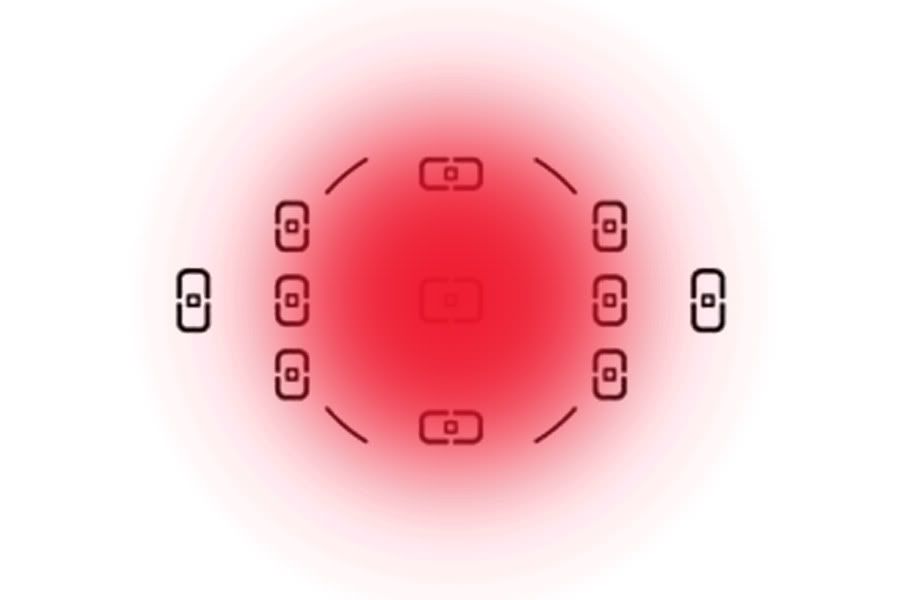
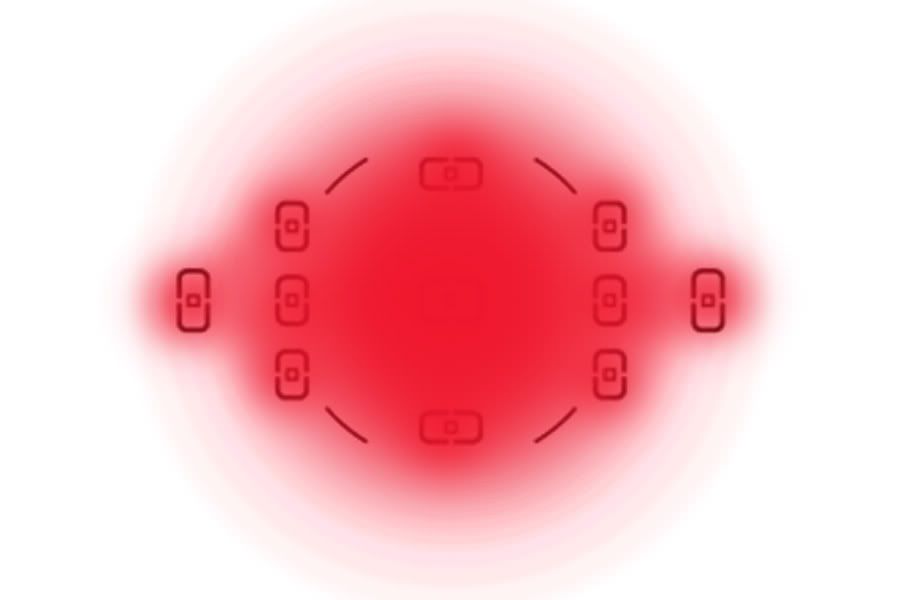
It would appear that making the flash head rectangular has worked out to be counter-productive in that it creates a diamond pattern at a 45 degree angle to the subject !
I would also imagine that by making a reflective 'snoot' around the flash head that bounces this wasted pattern back to the subject we would get a much better diffusion effect than by putting on the diffuser dome which has almost exactly the same area as the flash head itself anyway - I reckon we could also have close to twice the flash power hitting the subject considering how much falls outside the frame .


Friday, February 19, 2010

Flash : bounce card and diffuser tests


I decided to do some tests to see how much light the bounce card and diffuser dome actually throw forward when used .
Partly to also show the futility of only using the bounce card for outdoor flash .


First I took a picture at iso 200 F16 and 1/500th sec [ my D50 can synch flash at 1/500th ] .


Then I took an image with direct flash at 1/128th power .
That gave me a 'pivotal' calculation point , something to compare with .

 
I tilted the flash head upwards and pulled out the bounce card - which also pulls out the wide angle diffuser .
I had to take the flash power to 1/8th to get a similar histogram to the first flash image which tells me that it only throws forward 8/128= 1/16th of the flash or 6% .
But the wide diffuser has a flat edge that also throws forward some light so I tucked that away and tried with only the bounce card out .
I had to go almost all the way to 1/4 power , just a little less , to get the same histogram . here it is at 1/4 power . A bit brighter so somewhere between 1/8th and 1/4 would be right .


This shows that the wide plastic diffuser on the SB800 that pops out with the bounce card throws forward almost as much light as the bounce card itself . Part of this could be due to the fact that since it makes the flash spread more it is directing more light toward the bounce card itself to throw forward .


Then I put the diffuser dome that comes with the flash on , and tilted the flash head at 60 degrees as suggested by the manual and found that I had to only go to 1/16th power to get a similar histogram to the 1/128th power direct flash .
 
128/16 = 8 , 1/8= 12.5 % . 
That suggests to me that the diffuser dome throws forward around 12.5% of the total flash output .
These figures are pretty rough and I'm sure they could be refined a little but I think they give a reasonable idea of the amount of light thrown forward by these flash modifiers .


Wednesday, February 17, 2010

Professionals make mistakes too !

To make beginners feel better : professionals make mistakes too - but unfortunately sometimes they publish them as well  .
Why do people write photography books ? For the money , not because they want to help people !

{Please note : I am not condemning entire books - just warning about information that could be misleading to a beginner - the rest of the information in the  books mentioned is useful ! }


Many of these people are very knowledgeable about photography but are not necessarily 100% right in all their statements .
As I read through some of the more popular books I see mistakes that could greatly mislead beginners so I thought I would list them here for the benefit of beginners trying to find their way through a sea of [ sometimes incorrect] information .
It's confusing enough as a beginner without reading misleading statements that could further confuse your learning process !


I am busy with this book and on page 18 the author makes the statement about "BL" flash that in this mode " the flash is trying to make the foreground and background roughly equivalent exposure zones " .... that's close to what the manual says which is also ambiguous . Then he goes on to state that if the background is dark it will blow the subject trying to light the background as well  . Nothing could be further from the truth ! In my blog on TTL/BL I explain my tests and how it really works . 

{5/03/2010 :
I've decided to expand on this particular subject since many are questioning my basis for stating that the book's description is totally wrong . The problem lies primarily with Nikon who haven't explained things properly to us .
Page 37 of the SB800 manual describes TTL/BL flash in a very ambiguous way [ I'll go so far as to say the manual is wrong as well in this respect ] ... with regard to TTL/BL "Automatic balanced Fill Flash " it states " The flash output is adjusted for a well balanced exposure of the main subject and background " .... work that one out without getting everyone confused . I started doing tests with TTL/BL flash almost a year ago on Nikoncafe . After many test images [ you can see them on my photobucket album in the "flash" album , most have text on them ] I concluded that TTL/BL only cares about correct exposure on the subject and is far more accurate than TTL flash .
To stick to the subject at hand with TTL/BL it would be more accurate to read : " The flash output level is automatically adjusted for a well balanced exposure of the main subject taking the 'background' or ambient lighting already on it into account " .
As they say "a picture speaks a thousand words "
The author stated that the flash would "arm the photon warhead " and " obliterate the darkness " .. some simple tests will confirm the inaccuracy  of this statement .
To digress slightly TTL flash does this when the subject is smaller than the metering area in the centre of the frame ...


Now we go to TTL/BL , due to the fact that it can 'map out' its subject using the matrix metering pattern - and has the advantage of distance info - it is much more accurate :

 So : Did TTL/BL try to obliterate the darkness ? No , it concentrated on the subject . If anyone still doesn't believe me than all you have to do is try it out for yourself and you will see that the statement that TTL/BL will try to light the background is totally wrong .
 So , Never base your statements on something you have read in a manual or heard from someone else - do your own tests and you will learn so much more .... and never make statements in a book based on what you think the manual means - it will get back to you in the end ! } 


The incorrect statement is due to a rather ambiguous statement in the Nikon manual that has been badly misinterpreted . In reality , the wireless CLS that the author praises so highly uses the same metering mode as TTL/BL  ! BL mode will try to get perfect exposure on the subject " and take the ambient[ background] lighting on the subject into account " - that's the balancing part of it .


On to page 258 " I want the light source to be at least twice as far away as I had it , so that's gonna mean twice the power " ..... this is totally wrong , due to the inverse square law  twice the distance means 4X the power ! 
This may have been a genuine mistake overlooked by a hasty review before publishing  - but it's going to have a lot of beginners believing the wrong thing . I can understand a hastily written website that can be changed but there is little excuse for not checking the info that will be released in a book with no chance to change it later .

Update : 8/04/2010 . I've finished reading the other book from this author and was rather disturbed at his statements about telling people anything they want to hear to get the job and achieve success . 
I don't agree with lying to get what you want and at that ''moment it clicked'' ...... how much of a book ' written to make money' can you believe from an author who advocates lying to achieve success ???


The other book I was reading recently ....


.... has a suggestion on page 41 about using fill flash outdoors .


I have seriously never seen anything so pointless !
How much of the light in this image do you think is going to go forward  .... maybe 1% of 5% ? You'll have your flash firing at full power every shot just to put catch-lights in the subjects eyes , and those catch-lights will be "L"- shaped .

No wonder we have global warming and professionals complain about burning out flash heads ! 

Please note : I agree that fill flash should be used outdoors ! You will do well to follow the advice to use it .... BUT : wasting flash into the air makes no sense when you can simply dial back direct flash for the same results and use less than 1/100th of the power .
 
This weekend I will do some tests to verify the amount of flash that hits the subject with the bounce card .
With outdoor flash you will have the flash dialed down , your working distance will already be greatly reduced and you will hardly notice direct flash at -3 compensation  when used as fill flash .
Why fire the flash at the moon and only get 0.05% of the flash power hitting the subject ? That's one way to fry a flash and waste battery power .


On to the tests :


To give him the benefit of the doubt I stood 6 feet away , he mentioned 8-10 feet .


Just to make sure we were getting the full potential of the flash I set the flash to manual and full power ....


Pretty dismal isn't it [ not the subject! ]

Then I went to TTL/BL -1 direct flash ...


I won't show the picture of my face 2 feet from the camera but when I put the camera in manual at those settings at 1/128th power it tells me I have 0.6m working distance .... with direct flash that is .
At 0.6m [ 2 feet ] with the flash in the suggested position there is still not enough flash at full power .... this suggests that we are getting less than 1/128th of the power from the sideways light using the suggested setup .
You will use more than 150 X the flash power and flatten your batteries more than 150 X faster using this ' technique ' .
I rest my case ... it's a bad suggestion regardless of who made it .


When I buy a camera I expect everything on it to work .
I expect everything in the manual to be correct .
And when I pay for a book of photography knowledge I expect it to be correct .


If anyone has anything to add to this page please let me know !

Friday, February 12, 2010

Flash : off camera flash with a compact

I set myself a goal to see how much I can do with the least fancy camera , to show that it is not so much the gear you have as understanding the principles . I dug out my 6 meg compact , an optical flash trigger and an old SB24 ...


In all I think it was a good exercise !

The biggest challenge with this compact is getting it to focus properly since there is no manual control for the focus . I have to let it auto focus with the led , set the 10 second self timer and drop the glass when it fires .....


Friday, February 5, 2010

Flash : "Rear curtain" or "Second curtain" flash .

Rear curtain flash can be the hardest mode to understand  but once you understand it , it makes 'normal' flash easier to understand .
First try to think of the camera's shutter as the curtains on a stage . The left curtain is bunched up hard against the left hand side and the right curtain is pulled all the way across to the left as well and is blocking the entire "stage" [ sensor in this case ] .
When we push the shutter release button the right curtain pulls open all the way across to the right [ This would be the 'front' or 'first' curtain ] and exposes the stage [ the sensor ] , and when we have enough light the left curtain [ This would be the 'rear' or 'second' curtain in a camera ] pulls across all the way to the right as well blocking the 'stage' [ sensor ] from any further light . This is similar to the way the shutter in the camera works and why it is called "rear curtain" or "second curtain" flash .
Here's my test image without flash :


And then again with flash :


Now : Flash fires in about 1/700th of a second at full power and at minimum power as fast as 1/40 000th sec [ with the Nikon SB800 ] . So basically the flash is over in a very short time compared to how long the shutter actually stays open  .
To make it easier to comprehend I took some images at 1/500th second and divided that into an imaginary slow motion time-line .
1/100th second is the same as 5/500th of a second - or 5 X 1/500th second . 

This is how much light is captured in 1/5th of 1/100th second :


We need 5X as much light as this for our ambient .
In slow motion the exposure would look like 5 images at 1/500th second .
The difference is that in normal flash mode the flash fires as the first curtain opens but in "rear-curtain" mode the flash fires just before the second curtain closes .... something like this :


So what's the point of using "rear curtain" flash if the exposure is the same ?
It depends what shutter speeds you are using and what you are photographing . In the above examples there is no real difference but if you have a moving subject at slower speeds the difference becomes apparent :
As mentioned normal flash fires at the beginning of the exposure which would have this effect with a moving subject , in this case I dropped a golf ball and took a picture with flash . The flash fired as I pressed the shutter release , the ghost trail under the ball however makes it look wrong - almost like the ball is jumping back into my hand .


Now we switch to "rear curtain" flash and things look more realistic because the flash fires at the end of the action and the ghost trail is behind the subject ! Now it actually looks like the ball is falling down - not jumping up .


Of course you would be using a much more photogenic subject - or even a car driving past with its tail lights blurred behind it , but these images should give you a general idea of how "Rear curtain" flash works .
Please remember that using ' rear curtain ' mode will cause your camera settings to behave a little differently to using normal flash .
When you select this mode the camera assumes that you want to get some blur effects and will not jump to the default flash speed  
[ 1/60th in most cases ] .
It will behave very much like the flash is not turned on and will select whatever shutter speed it deems necessary to capture the ambient exposure . This aspect of rear-curtain flash is the same as 'slow-synch' flash which allows the shutter speed to drop low enough to capture the ambient as well .
This is why it is good to learn to go manual when indoors and using flash - so you can control exactly where you want the settings to be .
Video


Flash information for beginners .

{ Work in progress - more to come !}
Flash is probably the hardest concept of photography for beginners to understand . 
I guarantee when you have finished reading and have understood this article you will know more about flash than many professional photographers because many people who charge for their photography really only know what's necessary to get the results they want , and not much more !


The most important thing to understand about flash is that when you use it you are in fact taking two exposures in one .


There are two basic modes of flash :
1.)  Manual and 
2.) Automatic .


1.) Manual flash is basically where you set the power of the flash anywhere from full power (1/1) to minimum power (1/128th) - in some flashes you are limited to 1/16th as lowest power .
Each step halves the power of the previous output .
1/1 , 1/2 , 1/4 , 1/8 , 1/16 / 1/32 , 1/64 , 1/128 th power . 
Some of the newer flashes allow 1/3 increments between those settings as well .
Manual flash requires the most experience and understanding and is well worth learning but I would suggest having a basic understanding of the auto modes as something to fall back on before attempting an important shoot in manual flash mode .


2 . ) Auto flash . This we'll divide into 3 sub-divisions . 


a.) "A" mode 
b.) "TTL" mode 
c.) "TTL/BL"[Nikon] / "E-TTL" [ Canon ] .


2a.) "A" mode is present mostly on older flashes but some of the higher end modern flashes have "A" mode as an option for those who are used to working with it . Very few people use this option though it does have its uses , particularly with wireless flash when the light isn't firing in the centre of the frame and you would like the flash to measure its output itself .
This mode uses a thyristor control which works through a little 'eye' on the flash itself . The flash measures its own output through this 'eye' and switches the flash output off when it measures the right amount of light .
Since the hole it measures from is at a slightly different level to the camera lens it is better to use normal TTL when the flash is mounted on the camera . 


2b.) TTL flash : "TTL" stands for "Through The Lens" which suggests the main difference to "A" mode : Instead of measuring through the eye on the flash there is communication between the camera and flash  , the flash fires a weak 'pre-flash' which the camera measures "through the lens" and then tells the flash what it 'sees' so the flash knows how much power it needs to fire at for the main flash . I made a video explaining TTL flash to make this easier to understand .
With TTL flash the camera measures through a circle in the centre of the frame and tries to make that area an average gray .
It uses an area like this ...... [edit: cameras have changed with time and the newer cameras use the whole focus point diamond for TTL metering]
 
This means that if the subject does not fill the centre of the frame the flash will have to fire stronger than necessary to get that average gray it wants .... this is the main weakness you need to keep in mind with TTL flash . 
Here's and image taken using TTL flash with a white object in the centre of the frame - because it is reasonably large and very reflective TTL has done an ok job of the exposure .


 And an average of the centre ...


Now we use a wider lens and make the same image smaller in the centre of the frame ... TTL still tries to make the centre of the frame the same average gray and to do this it has to make the smaller image much brighter and blow the highlights .


 And an average of the centre again ..


That's the main weakness of TTL flash that you need to keep in mind especially with direct flash and smaller subjects . Another weakness of TTL flash is that it doesn't know what you are doing with the ambient exposure so you need to dial in exposure compensation to the flash when you have the ambient well exposed . More on that in the 'advanced' section later .


This leads us to the newer auto modes ....  


2c.) TTL/BL and E-TTL . 
In these modes the camera still uses TTL metering to measure the flash output but it can select the area it uses to meter from . 
It does this by using the matrix / pattern metering system mainly near the centre of the frame - or the "focus point diamond "[video] 
and upon sending out a pre-flash it 'finds' the subject based on the pattern it 'sees' from the reflected reading it gets . 


this means it is not fooled so easily by a smaller object .
While TTL flash is trying to get an average gray in the entire centre of the frame .....
 

TTL/BL and E-TTL has the intelligence to 'map out' which is the subject using the pre-flash reading and then meter for that area only !


Besides this advantage another strong point of these new intelligent flash modes is that they can read the distance of the subject [with certain lenses ] and use that in their calculations to determine how much light to put out , according to the distance of the subject , which makes them much more accurate than the old TTL modes .
They lose much of this advantage when the flash head is tilted - a switch in the flash head tells it to forget about using distance info so strongly [ though it still keeps it in mind ] and then it has to rely more on the reflected pre-flash reading .
This brings us to yet another advantage with these newer systems .. because they can select the area they meter off they can also select the areas they don't want to meter off ... such as ? Highly reflective surfaces - the camera can analyze the pattern it sees and decide that very bright highlights are actually highly reflective areas and disregard them from the equation ..... example :
While TTL flash darkens due to the reflections [ while taking an average reading ] ...


TTL/BL [ video ] can determine that the really bright spots are in fact just reflections and disregard them .....


The following is accurate for Nikon TTL/BL but still has to be confirmed in tests with Canon's E-TTL
 Perhaps one of the most significant differences with these new modes is the fact that they are ' watching your meter ' and adjust output depending on how well you have the ambient exposed [video] . This can be affected by the metering mode you choose as shown in the video since the movement of the meter depends very much on the metering mode you have chosen so in some cases flash output can change when you switch from one metering mode to another without even having changed your settings .  
 

{I'll continue to refine this section based on feedback especially from beginners , there is much to learn about flash !}
23/05/2010 , added balancing flash with ambient .


-->