My friend doesn't like liquorice , I love the stuff but I can't tell him he is wrong for not liking it and he can't tell me I am wrong for liking it - opinions vary . But I just did a quick search on the topic and found that too much is toxic to the liver . Now if he tells me that I can't argue because it is a fact .
It's the same with a picture you like whether you took it with your pretty pink camera or someone else took it , nobody can tell you it does not look nice - to you . They can tell you however that the horizon is tilted which is a bad mistake - unless it was done on purpose because of a personal preference . [ Maybe someone needs to eat a lot of liquorice because they have a chemical imbalance that gets fixed by it ! ] .
Also , if you are getting the results you want don't let anyone tell you your method is wrong . The greatest accomplishment in photography is to be able to dial in the settings you want and get the picture looking exactly the way you planned it without any more adjustments ! Even if nobody else likes the picture and you do - you can't get more skillful than that . but of course if nobody else likes it you may have to decide whether you just want to be an artist or adapt your style to something customers will pay for .
But if you're a beginner don't defend all the pictures your camera takes just because you like it because it is a pretty pink design that goes with your hand-bag - and that applies to the ladies as well !
You may also be told that you have to eventually shoot in manual mode but if you took a picture in aperture priority mode with -1.3 EV compensation dialed in and +0.7 on the flash and got the results you were after it is nobody's business why you never shot in manual mode . Many of the purists will insist that the ultimate accomplishment is to shoot in manual - generally because they are old codgers that never had access to cameras with good auto modes in their day . I would still advise learning to shoot in manual - when you have the time to play with , but not as a first try at in important event .
Also when conditions are changing quite quickly it is better to know your results are going to be 'close enough' in an auto mode as with dance photography , than to get one perfect shot in manual mode only to have every other shot totally destroyed by a sudden change in lighting .
Learning to shoot in manual helps you learn a lot about photography , use it when you can , but learning how the auto modes respond to various conditions can be a lifesaver when the action speeds up . I personally hardly ever shoot in manual mode because I don't have a very good memory and might forget the camera at a setting after I have moved on - and even if I didn't there are some conditions that change too quickly for me to react fast enough in manual mode - depending on many variables of course . It's best to know how to drive a manual car and an automatic - then you are covered in all situations ..... but if you have only ever driven an automatic you don't enter a race in a manual car ! In other words don't let anyone talk you into going manual for your first wedding if you only know automatic .
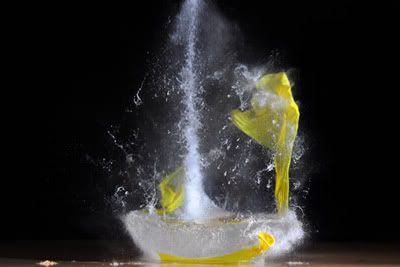
I go manual when I am indoors at night and my flash is controlling the exposure and when I am doing things that require certain settings like with the sound activated flash trigger and balloons [ and an air rifle ] .
When things are moving faster I choose to use whatever does the job which is why I study how the different modes work - so I know which one will make similar decisions to the ones I would make .
So listen to advice but don't let others steer your opinion .... unless they are your customers that you rely on to make a living .
Friday, March 26, 2010
Monday, March 22, 2010
The legendary Nikon D50
I'm not one to rave about camera gear but occasionally something comes along that has proven itself over time and stood out from the rest - like the humble D50 !
Taken a few days ago with the D50 and 18-200VR lens ...

This image had a levels adjustment in photoshop - nothing else .
The D50 produces very sharp images straight out of the camera , it has been suggested that this is because it was aimed at beginners who wouldn't know how to process the images . It is advisable to turn down the sharpening and do that later if you edit your own images .
D50 , 85mm F1.8 lens .

Many pros keep one as a second camera .
I bought mine years ago when they first came out , as back-up for my original D70 .
When it was time to 'upgrade' to the D80 I got rid of the D70 since the D50 had better image quality .
When I bought a good used D200 I got rid of it within two weeks - mainly because it was so different to my other cameras but also because it had more noise than the D50 .
I eventually traded in my D80 for two "brand new" D70s bodies that had been hidden on the shelf of a store that closed down . One of them had 1500 shots on it and the other was genuinely brand new .
I got rid of them both and kept the D50 when I upgraded to the D90 .
I also have a D40 now and on the local online auction sites the used D50s are commanding a higher price than used D40's - mainly due to the fact that the D50 has the focus screw-drive that the D40 lacks .
If I had to get rid of one camera I would keep the D50 and part with the D40 - mainly because of the lack of a focus drive in the D40 .
One day I shot a sports event with my D50 , the battery life is rated at 2700 per charge but took mine to 3000 before putting the battery on charge .... actually the battery hadn't started showing that it was getting flat yet but it would have probably dropped quickly when it did . I carried on and shot another 1000 images with it that day - 4000 in total .
Since the D50 has an electronically switched sensor/shutter rather than a focal plane shutter it can do things that no pro camera can do . I explain "realsynch flash" on another blog .
When using flash with the D50 [ and the D40/ D70 ] you have a maximum flash synch speed of 1/500th sec - as opposed to 1/200th on the D90 and 1/250th on the D300 .
This gives you twice the flash power as a professional camera . The flash power itself doesn't change but the fact that you can go to a higher speed means that you can open the aperture more , or increase the iso more , which both effectively make the flash twice as strong .
If you click that link to my other blog you will find out how to use the flash at any speed - and even have it working at 1/4000th sec and putting out 6X more power than a D300 and SB800 in auto-fp mode .
So : The D50 has better high iso performance than a D200 , faster flash synch speeds than any pro camera , good straight out of camera' jpeg output and is one of the few cameras that has never needed a firmware upgrade and people are selling them because they are 'only' 6 megapixels ?.
Forget the megapixels , 6 is enough for almost any use - they used to shoot weddings with the 2.7 meg D1 and the 5 meg Olympus E1 so 6 meg is enough !
My trusty D50 has become my 'hack' camera which goes into the mountains with me and anywhere else I am scared to take my D90's .
Taken a few days ago with the D50 and 18-200VR lens ...

This image had a levels adjustment in photoshop - nothing else .
The D50 produces very sharp images straight out of the camera , it has been suggested that this is because it was aimed at beginners who wouldn't know how to process the images . It is advisable to turn down the sharpening and do that later if you edit your own images .
D50 , 85mm F1.8 lens .
Many pros keep one as a second camera .
I bought mine years ago when they first came out , as back-up for my original D70 .
When it was time to 'upgrade' to the D80 I got rid of the D70 since the D50 had better image quality .
When I bought a good used D200 I got rid of it within two weeks - mainly because it was so different to my other cameras but also because it had more noise than the D50 .
I eventually traded in my D80 for two "brand new" D70s bodies that had been hidden on the shelf of a store that closed down . One of them had 1500 shots on it and the other was genuinely brand new .
I got rid of them both and kept the D50 when I upgraded to the D90 .
I also have a D40 now and on the local online auction sites the used D50s are commanding a higher price than used D40's - mainly due to the fact that the D50 has the focus screw-drive that the D40 lacks .
If I had to get rid of one camera I would keep the D50 and part with the D40 - mainly because of the lack of a focus drive in the D40 .
One day I shot a sports event with my D50 , the battery life is rated at 2700 per charge but took mine to 3000 before putting the battery on charge .... actually the battery hadn't started showing that it was getting flat yet but it would have probably dropped quickly when it did . I carried on and shot another 1000 images with it that day - 4000 in total .
Since the D50 has an electronically switched sensor/shutter rather than a focal plane shutter it can do things that no pro camera can do . I explain "realsynch flash" on another blog .
When using flash with the D50 [ and the D40/ D70 ] you have a maximum flash synch speed of 1/500th sec - as opposed to 1/200th on the D90 and 1/250th on the D300 .
This gives you twice the flash power as a professional camera . The flash power itself doesn't change but the fact that you can go to a higher speed means that you can open the aperture more , or increase the iso more , which both effectively make the flash twice as strong .
If you click that link to my other blog you will find out how to use the flash at any speed - and even have it working at 1/4000th sec and putting out 6X more power than a D300 and SB800 in auto-fp mode .
So : The D50 has better high iso performance than a D200 , faster flash synch speeds than any pro camera , good straight out of camera' jpeg output and is one of the few cameras that has never needed a firmware upgrade and people are selling them because they are 'only' 6 megapixels ?.
Forget the megapixels , 6 is enough for almost any use - they used to shoot weddings with the 2.7 meg D1 and the 5 meg Olympus E1 so 6 meg is enough !
My trusty D50 has become my 'hack' camera which goes into the mountains with me and anywhere else I am scared to take my D90's .
Saturday, March 20, 2010
Flash : Dramatic lighting in daylight
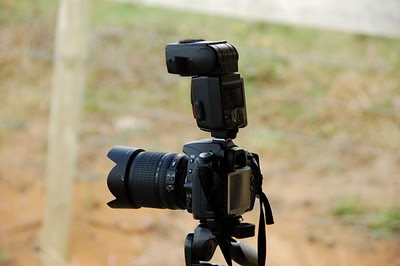
Today I did some tests to see what working distance I could get outdoors during the day with one flash and an under-exposed background .
I set the camera up in manual mode and metered the lighting at iso 200 , 1/200th and F16 . Occasionally the meter jumped to show that I needed F18 but that was due to the bright cloud .

And of course with me standing in the shade this is what it looks like without flash .
 [ It has been pointed out that there is a difference in the background exposure - this is due to the clouds moving and the sun appearing occasionally , these things are never simple :) ]
Then we add direct flash .

And then I added the diffuser dome ....

There is very little difference with direct flash and the diffuser dome - the face of the dome is the same size as the flash head and provides the same amount of diffusion outdoors besides wasting a lot of energy on nothing by firing the flash at a much wider angle than the lens is taking in .
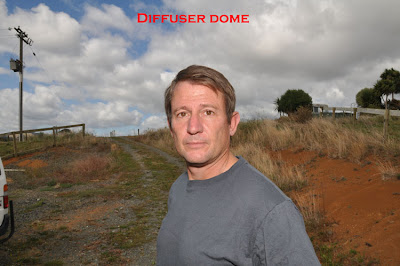
I haven't yet seen a logical reason to use the diffuser dome outdoors - all it does is waste power without adding anything to the picture .
I also tried a few shots with my large bounce card at an angle and realistically all it does is shift the angle of the flash a bit to the side and waste power . If you are close enough to the subject this change in angle can look quite dramatic but for practical photography it makes very little difference .

Now on to the 'dramatic' aspect of the experiment . Some people will dial in "-1.7" on the ambient [ any light that isn't flash ] exposure to make the background darker and the subject stand out . I was in manual mode and dialed in an aperture of F29 which showed me "-1.7" on the exposure scale of my meter .

Now at the aperture of F16 the flash was already telling me I had about 4 m working distance at best . By dialing in -1.7 I am also making it harder for the flash - smaller apertures mean it needs more power to get the same amount of exposure on the subject . [ A smaller aperture lets in much less light - ambient or flash - and so while darkening the background also requires more flash power for the subject ] .
At F29 the flash head was telling me I had 2.2 metres working distance at 50mm and 0.8 metres with the diffuser dome on . Since we are under-exposing the ambient by so much the flash will need to light the subject on its own so we aren't just using 'fill-flash' here .
If we only have 0.8m with the diffuser dome on then tilting the flash head and using the bounce card would waste more power and render that approach useless basically .
I went to plan-B and took the flash off the camera using an SC-17 flash cord .

This was held in one hand facing directly at the subject and provides the very different look of off-camera flash along with the dramatic side lighting and dark background which makes the picture look very different to the first picture with flash .
These images are all straight out of the camera with no processing or adjustments to the flash [ TTL/BL mode ] and obviously could look better with some adjustments and a prettier subject !

We are saving a lot of power with direct flash and hence maintaining our working distance compared to diffusers . We would need more flash power if we wanted to diffuse the light as well - or darker ambient lighting - then we could open the aperture up a bit more to help the flash . Late afternoon or dusk would provide ideal conditions to be able to have a dark sky and a wide enough aperture for the flash to be strong enough to also be diffused for even more professional results . The resulting image demonstrates hard lighting which gives a more dramatic image than soft lighting.
-->
I set the camera up in manual mode and metered the lighting at iso 200 , 1/200th and F16 . Occasionally the meter jumped to show that I needed F18 but that was due to the bright cloud .

And of course with me standing in the shade this is what it looks like without flash .

Then we add direct flash .


And then I added the diffuser dome ....

There is very little difference with direct flash and the diffuser dome - the face of the dome is the same size as the flash head and provides the same amount of diffusion outdoors besides wasting a lot of energy on nothing by firing the flash at a much wider angle than the lens is taking in .

I haven't yet seen a logical reason to use the diffuser dome outdoors - all it does is waste power without adding anything to the picture .
I also tried a few shots with my large bounce card at an angle and realistically all it does is shift the angle of the flash a bit to the side and waste power . If you are close enough to the subject this change in angle can look quite dramatic but for practical photography it makes very little difference .

Now on to the 'dramatic' aspect of the experiment . Some people will dial in "-1.7" on the ambient [ any light that isn't flash ] exposure to make the background darker and the subject stand out . I was in manual mode and dialed in an aperture of F29 which showed me "-1.7" on the exposure scale of my meter .

Now at the aperture of F16 the flash was already telling me I had about 4 m working distance at best . By dialing in -1.7 I am also making it harder for the flash - smaller apertures mean it needs more power to get the same amount of exposure on the subject . [ A smaller aperture lets in much less light - ambient or flash - and so while darkening the background also requires more flash power for the subject ] .
At F29 the flash head was telling me I had 2.2 metres working distance at 50mm and 0.8 metres with the diffuser dome on . Since we are under-exposing the ambient by so much the flash will need to light the subject on its own so we aren't just using 'fill-flash' here .
If we only have 0.8m with the diffuser dome on then tilting the flash head and using the bounce card would waste more power and render that approach useless basically .
I went to plan-B and took the flash off the camera using an SC-17 flash cord .

This was held in one hand facing directly at the subject and provides the very different look of off-camera flash along with the dramatic side lighting and dark background which makes the picture look very different to the first picture with flash .
These images are all straight out of the camera with no processing or adjustments to the flash [ TTL/BL mode ] and obviously could look better with some adjustments and a prettier subject !

We are saving a lot of power with direct flash and hence maintaining our working distance compared to diffusers . We would need more flash power if we wanted to diffuse the light as well - or darker ambient lighting - then we could open the aperture up a bit more to help the flash . Late afternoon or dusk would provide ideal conditions to be able to have a dark sky and a wide enough aperture for the flash to be strong enough to also be diffused for even more professional results . The resulting image demonstrates hard lighting which gives a more dramatic image than soft lighting.
-->
Sunday, March 14, 2010
Wedding photography poses
[ work in progress ]
I decided to keep a list of wedding poses as much for my own use as to help others . I'm going to store a few here so I can go through them before the occasional wedding I do and invite others to add to them .
I'm not saying they are great - just trying to make a list of examples to think of before shooting my next wedding .
1.) Lying on the couch/bench .

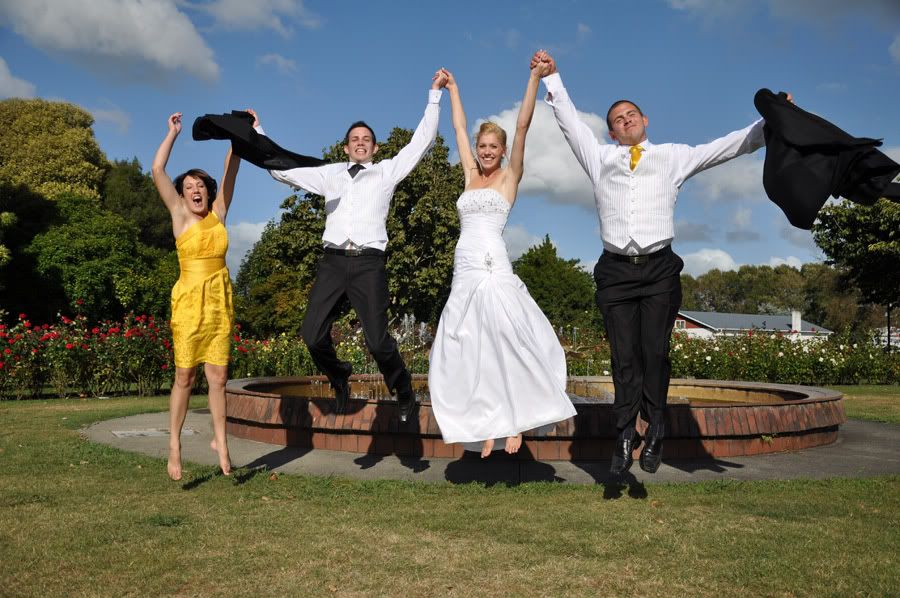
2.) The 'jump shot ' [ for the couples that are into this type of thing ]
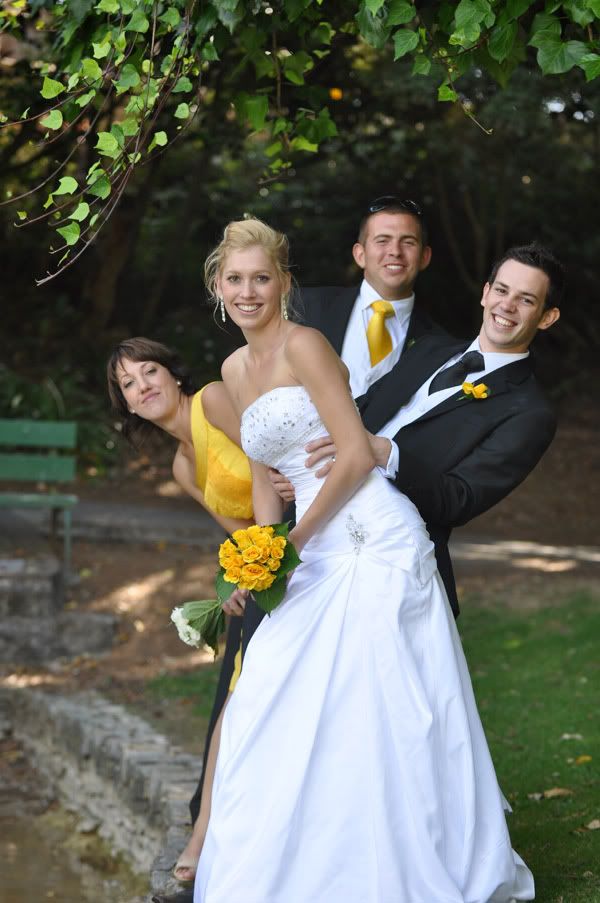
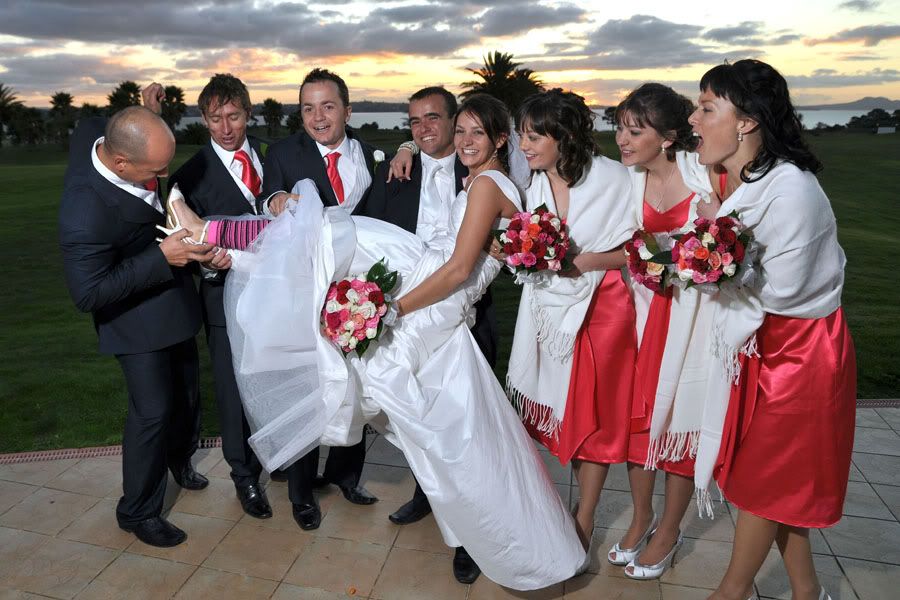
3.) The ''human bouquet ''
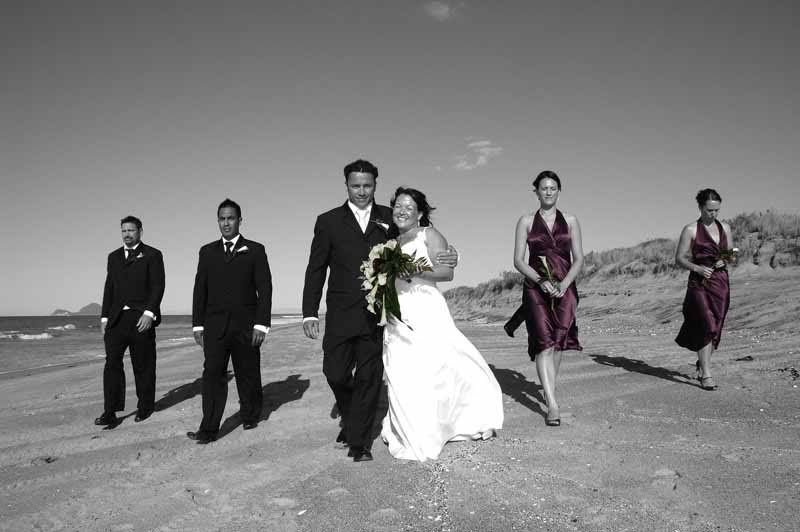
4.) Multi walking image
5.) Sunset with side flash
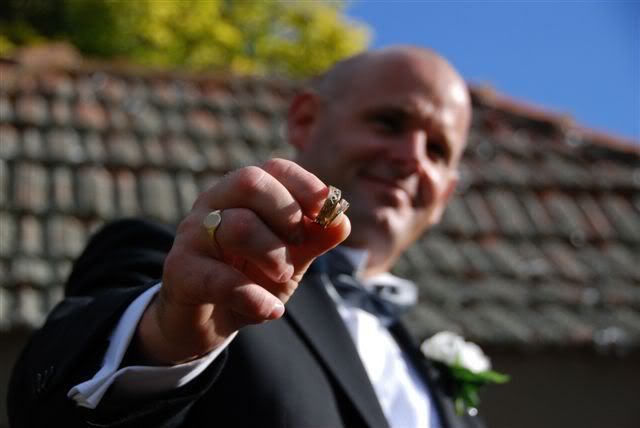
5.) Ring shots
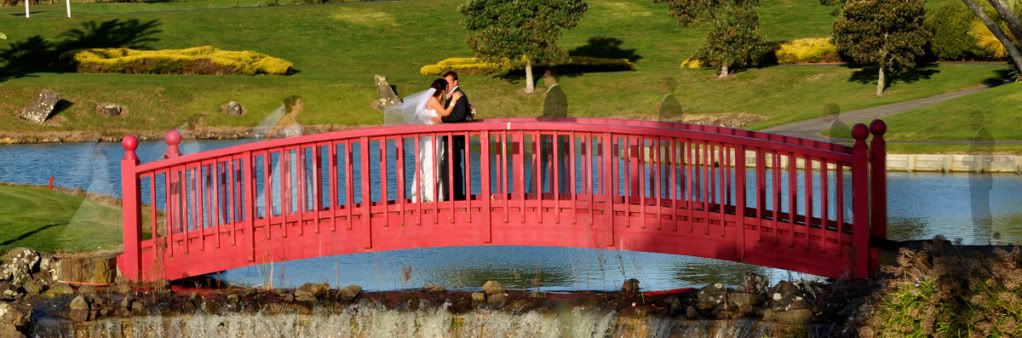
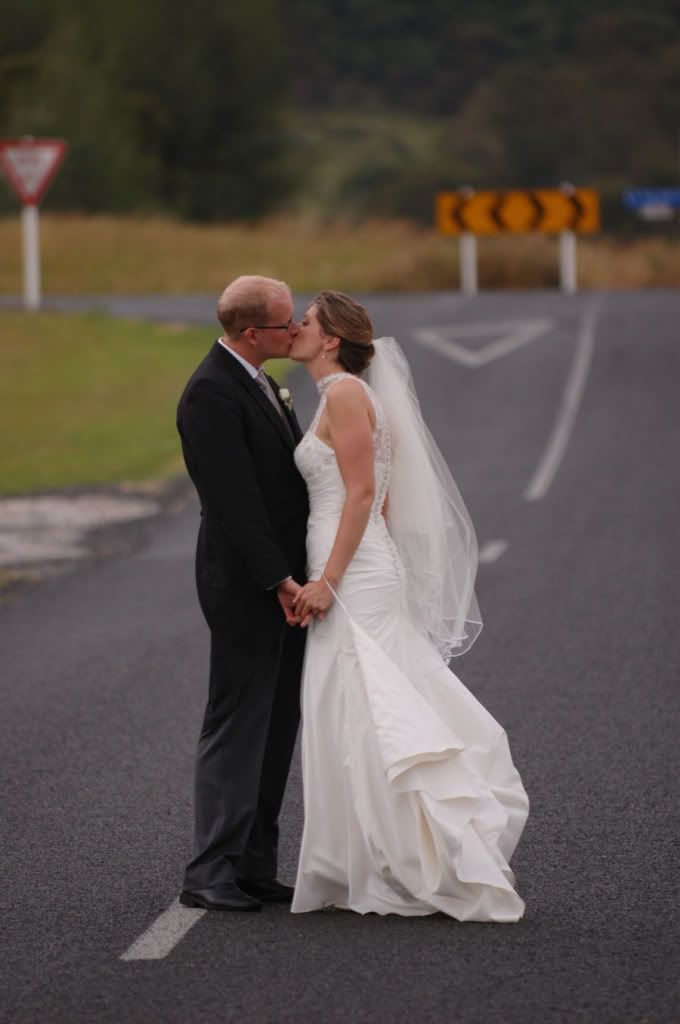
 6.) Standing in the road .
7.) Veil over face

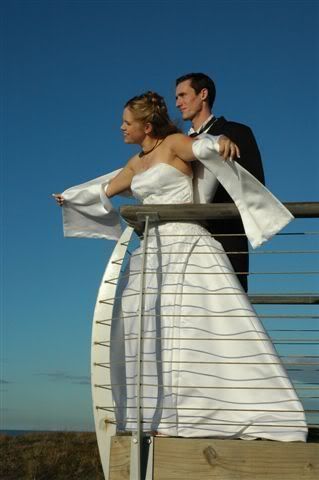
8.) Flying V
9.) Titanic
10.) Rings
12.) Bright backlight

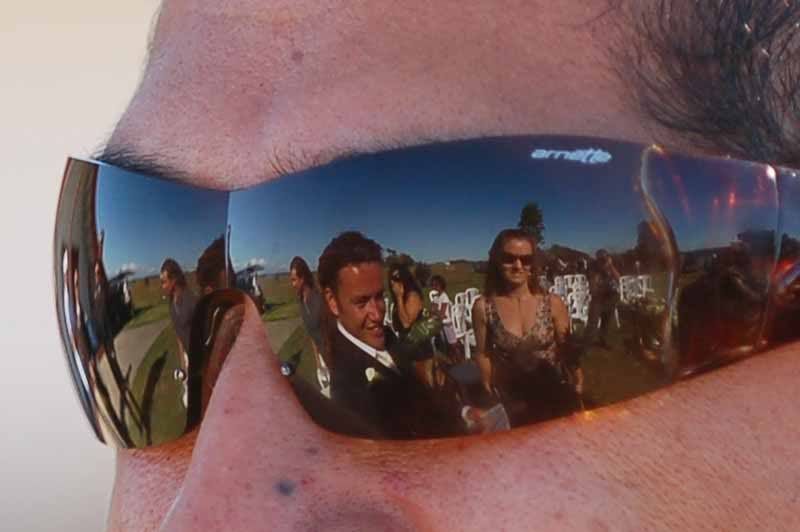
13.) Look for reflections ....
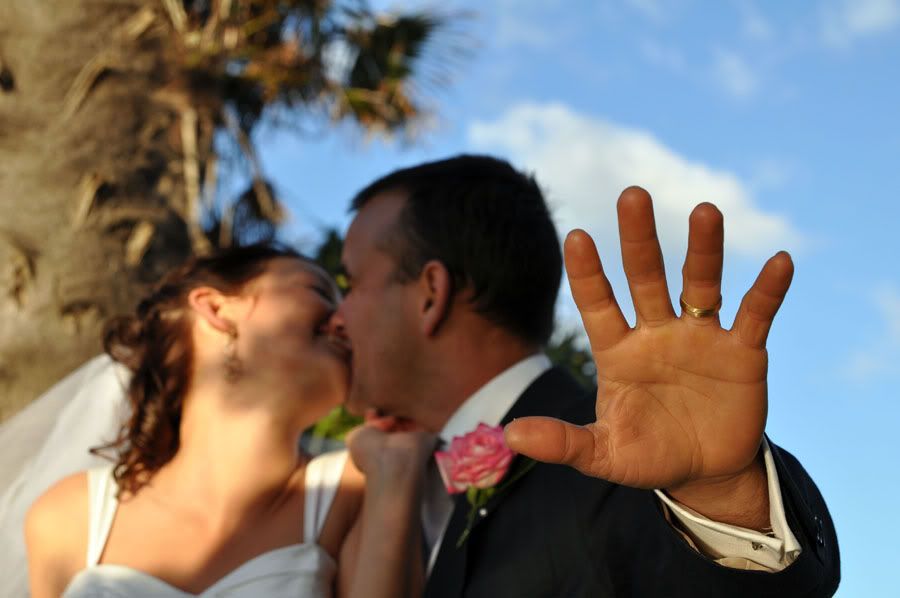
14.) Hand in front of camera .
I decided to keep a list of wedding poses as much for my own use as to help others . I'm going to store a few here so I can go through them before the occasional wedding I do and invite others to add to them .
I'm not saying they are great - just trying to make a list of examples to think of before shooting my next wedding .
1.) Lying on the couch/bench .
2.) The 'jump shot ' [ for the couples that are into this type of thing ]
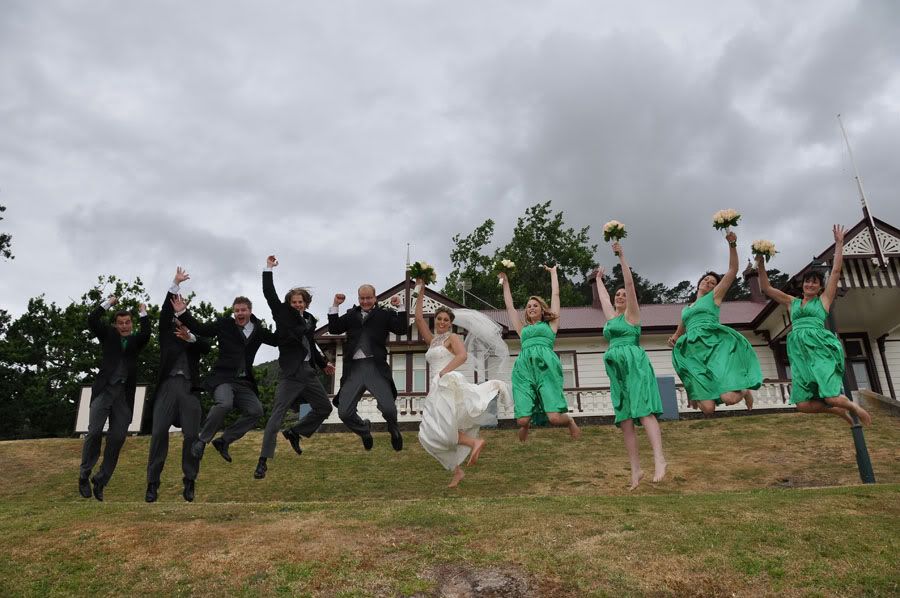
3.) The ''human bouquet ''
4.) Multi walking image
5.) Sunset with side flash
5.) Ring shots
7.) Veil over face
8.) Flying V
9.) Titanic
10.) Rings
12.) Bright backlight
13.) Look for reflections ....
14.) Hand in front of camera .
Saturday, March 6, 2010
Nikon TTL/BL 'mapped metering ' update
Taken from my TTL/BL blog
Disclaimer : This theory is made up based on my studies of TTL/BL and is not information from Nikon themselves .... but I still think it may be the truth .
This may be the most simple fact of TTL/BL - or just my wild speculation , but the easiest way to understand the fact that TTL/BL has a similar consistency to matrix metering is to think of it as the same program in that it can 'map out' its subject based on colour information [and the pre-flash reading] .
How can TTL/BL have greater consistency regardless of subject size unless it is totally independent of subject size ?
I'll start off with a simple subject with a dark background .

Whether we have the subject under-exposed or correctly exposed TTL sees this : The area it meters off - end of story .
 TTL/BL sees the subject based on the matrix metering pattern which is what gives it the edge with reflective subjects [ more on that later ] .
TTL needs to get an average gray in the centre of the frame and fires stronger when the subject does not fill the frame ....

to get this result .. [ average filter applied to centre of frame ]


If it does work the same way then my understanding of this is that TTL/BL can analyze the matrix metering pattern before the flash fires ....


Disclaimer : This theory is made up based on my studies of TTL/BL and is not information from Nikon themselves .... but I still think it may be the truth .
This may be the most simple fact of TTL/BL - or just my wild speculation , but the easiest way to understand the fact that TTL/BL has a similar consistency to matrix metering is to think of it as the same program in that it can 'map out' its subject based on colour information [and the pre-flash reading] .
How can TTL/BL have greater consistency regardless of subject size unless it is totally independent of subject size ?
I'll start off with a simple subject with a dark background .

Whether we have the subject under-exposed or correctly exposed TTL sees this : The area it meters off - end of story .

TTL needs to get an average gray in the centre of the frame and fires stronger when the subject does not fill the frame ....

to get this result .. [ average filter applied to centre of frame ]

TTL/BL on the other hand fires a pre-flash [ as does TTL ] and 'maps out ' its subject based on the reading it receives ....

It uses the 'focus point diamond' to determine where its subject is and 'maps it out' rather than relying on it being a certain size .
And gives a much better exposure ....

Then we move the subject off-centre and see what TTL does to get an average gray in the centre of the frame ....

TTL flash still only sees the centre of the frame and has to totally over-expose the subject to get its average gray in the centre circle ...

Now here's how I define TTL/BL metering , if the subject is off centre it is still using the focus point diamond to 'find' its subject and 'map it out ' and so maintains consistency with its output .

When it did its pre-flash it mapped out the subject using the matrix metering pattern and was not fooled by the off-centre subject [ which is why you don't need to use 'fv-lock' with TTL/BL ] .

Here's another two samples with the subject below the centre of the frame .... TTL :

TTL/BL :

I can think of no possible scenario where TTL will beat TTL/BL with direct flash [ which you would mostly use outdoors ] . In brighter light [ with the ambient closer to correct exposure ] TTL/BL will back off accordingly while TTL will fire at exactly the same power it has here .
On to the 'reflections' ... This is just theory based on some 'borrowed' information from the Canon E-TTL system . The Nikon manual mentions that TTL/BL is good for reflective surfaces but doesn't explain why . Obviously we can't simply assume that Canon and Nikon flash works the same way but much of E-TTL appears to work the same as TTL/BL and it is a useful explanation with regard to E-TTL which mentions that " E-TTL II examines all evaluative metering zones both before and after the E-TTL preflash goes off. Those areas with relatively small changes in brightness are then weighted for flash metering. This is done to avoid the common E-TTL problem of highly reflective materials causing specular highlights in a flash-illuminated image and throwing off the flash metering. ". As mentioned we can't 'assume' that TTL/BL and E-TTL work exactly the same way but it's a highly likely possibility .
If it does work the same way then my understanding of this is that TTL/BL can analyze the matrix metering pattern before the flash fires ....

And then when it fires the pre-flash it can trace out the subject and pick up the reflections and reject them from the metering equation ...

This may also be why TTL/BL doesn't work when you switch to spot metering . It needs the whole pattern to be active to do its calculations . Changing to spot metering 'switches off' the rest of the metering pattern and so TTL/BL can't do its calculations unless you are in centre weighted or matrix metering - because then the whole pattern is available for its use .
Monday, March 1, 2010
Exposure : Explained by Damian of Nikongear.com
I learned to photograph a long time ago using a completely manual camera. It taught me a great deal but I yearned for some automation to help me photograph fast-changing situations. Now our cameras can be so completely automated its tempting to never leave the comfort of those settings, but sometimes I yearn for control so I can be creative and not chained to the software settings chosen years ago in Japan.
I'm presuming you're reading this because you're interested in venturing out from under the auto umbrella. This post is what I regard as the very foundation of successful photography - Exposure - a word that gets used to describe the amount of light we allow the camera to capture.
1: Why does it matter?
Summary
Very simply, if we allow the camera to capture too much light, then the whole picture is white. If we dont allow the camera to capture enough light, then the whole picture is black.
A Bit More Detail
You might be thinking, well whats the big deal, my eyes get it right in all sorts of different places? You would, however, be missing quite how marvelous the eye is.
On a bright sunny day, outside in the sun at the equator, the light is streaming down and bouncing joyously around, higgledy piggledy. If I measured light in bananas[1], then there might be 100,000 of them on such a day.
On a very dark day, like the sort of sullen apology for a day we get here in England in Manchester in the middle of January, there might only 100 bananas. Thats a thousand times less light and yet apart from feeling a bit grumpy with everyone, we barely notice. Some might argue that Manchester just does that to people anyway.
If we went out on a moonlit night, there is only one tenth of a banana. For sure we notice that's darker than the day but on the whole we have no problem getting about in it. The other day I drove a car at 70 mph on a deserted motorway (highway) by moonlight alone just because I could. It's a thousand times less than our miserable Manchester midwinter morning and a million times less than the bright sunny day with which we started.
A millionfold variation in light levels is a bit much to ask of our cameras. In any case, you may also have noticed that in morose Manchester you can still see white paper and dark shadows just like you can in the sun, so clearly our mind or eyes (or both) is making something a thousand times darker (the piece of paper in Mizzogville) still appear white, just like it does in the sun.
So you can see that actually it is something of a big deal. A good camera can capture, in a single image, something like a thousandfold difference between something very light and something very dark. If we set the camera to capture our 100,000 bananas in the equatorial sun as fully bright, then we took it to Mank City it would only see darkness.
All this means we need a way to control the amount of light coming into the camera.
2: How Do We Do It In Theory?
Summary
In summary we've got the size of the hole (aperture) and the length of time it's open (shutter speed), and they are both defined in such a way that the familiar definitions give us something where a bigger number means less light. One thing that is very convenient is that one step (stop) of aperture changes things the same amount as one step (halving or doubling) in shutter speed, so we can to some extent dance between them.
Most modern cameras are capable of working in one-third steps, so in fact there are two finer choices available between, say, 1/250th and 1/125th, but that's a bit of a detail and doesnt really change the fundamentals.
A Bit more Detail
The camera is a light-gathering device. It captures the constant rain of light[2] in a bucket, then measures how much light in the bucket and writes it to an electronic file. Actually its a lot of little buckets to give you lots of points of information to define the picture. If we let too much light in then all the buckets are full and the file is completely white. If we don't let enough light in then there just some tiny splashes in the bottom of the buckets and the file is more or less completely dark.
Getting control is not very complicated, we have a hole and a cover over the hole. We can control the size of the hole and control for how long we uncover it.
The size of the hole doesn't sound grand enough, so we are inclined to call it aperture because it makes us feel better. Its also sometimes referred to as an f-stop, often with a flamboyant long f. Its not time to get mired in details about why its called that or where it comes from you dont really need to know that unless you are going to design lenses.
The really irritating thing for me about f-stops is that a little number means a big hole and a big number means a little hole. Whose idea of a good idea was that?
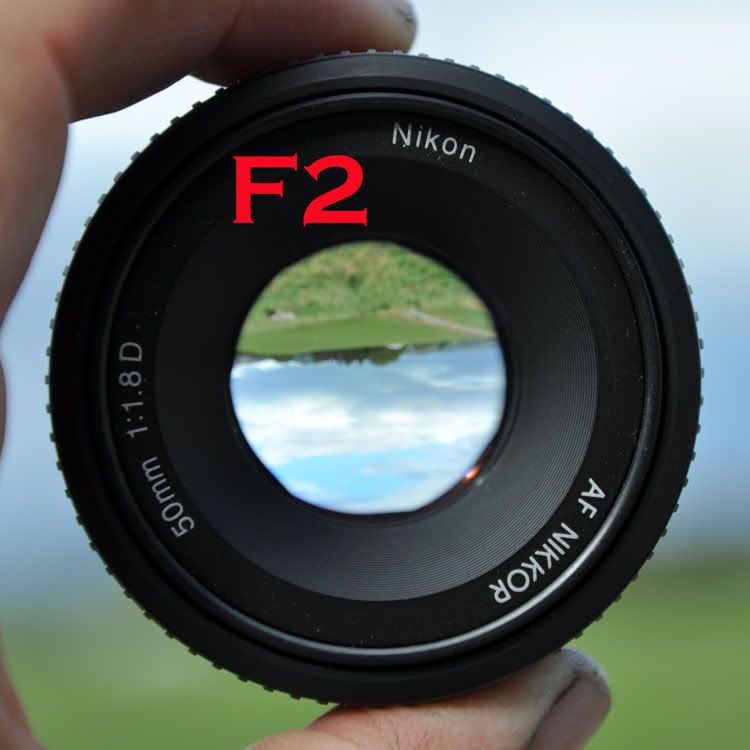
A big hole, also known as f-stop 2 or just f2
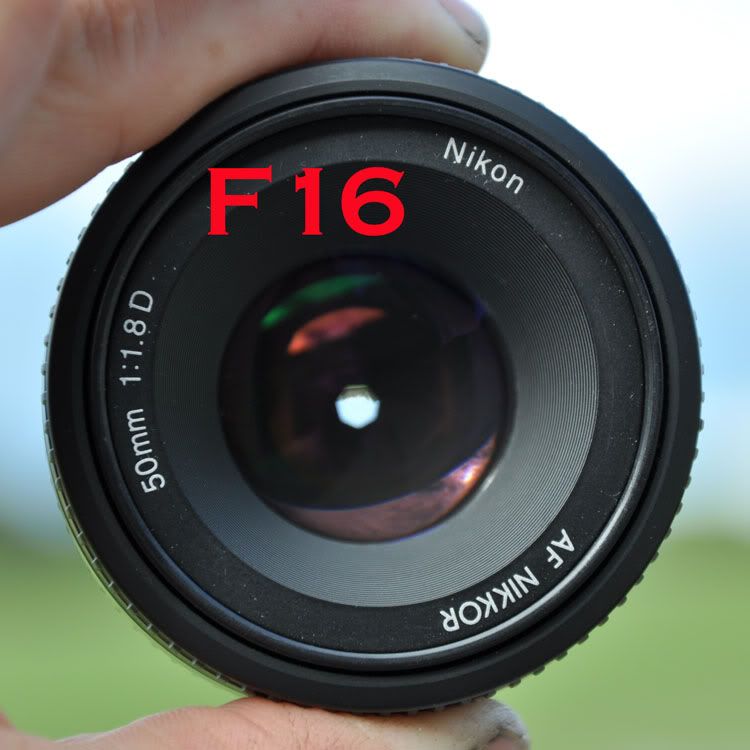
A little hole, also known as f16
f-stops go in a non-obvious progression, evidence of true genius at work, with twice the area of hole being signalled by (drum roll) a factor of the square root of 2. Dont worry, because you don't really need to know about it. If you're an apologist you might point out that a doubling of the area means an increase of 2 in diameter. I don't care, theres no excuse for having such an inaccessible set of numbers that I'm supposed to use when I'm cold, wet and tired. Anyway, enough of my grumbling.
There is a pattern of numbers which used to be engraved on lenses in the good old days, but is now displayed in an LCD panel[3]. This pattern goes something like:
1.4 2 2.8 4 5.6 8 11 16 22 32
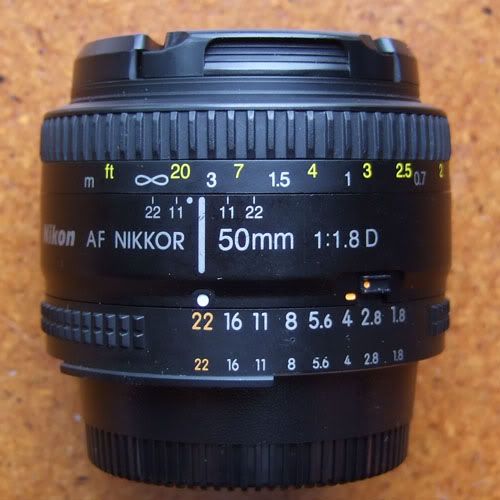
Your camera and/or lens might not have all those numbers but it will probably have some recognizable subset of them.
Each of these intervals is equal in terms of the change it makes, and each is known as 1 stop or 1 f-stop. I tell you this so you can uncover the next bluffer who crosses your path, rather than so you can memorise it - I won't be testing you on it. As I got cross about earlier, a bigger number means a smaller hole. Although it doesn't look very obvious, you soon get used to counting clicks on your camera as you set these numbers, so it doesn't actually matter if the sequence makes no sense to you.
The other primary control - I'll come onto what I mean by that in a minute - is how long we uncover the hole for. This is referred to as shutter speed. Yet again we want to work with steps that halve or double the amount of light in order to get control of exposure.
Yet again, some genius of terminology decided that working with ordinary numbers is too easy[4] and so the numbers on your camera are the bottom line of a fraction, giving you the time in seconds your shutter is open. So when your camera says 250 it actually means the shutter is open for 1/250th of a second. If you want more light, you need it open for longer. Is that 125 on the dial or 500? Yeah, see what I mean about the genius bit? It's 125 on the dial, because that means 1/125th of a second, which is 2/250ths of a second. This notation gets a bit inconvenient if you hold the shutter open for a very long time, if youre using a tripod for example, so the camera will add double quotes after the number if it is in whole seconds - thus 2 means half a second and 2" means 2 seconds.
In summary we've got aperture and shutter speed and they are both defined in such a way that the familiar definitions give us something where a bigger number means less light. One thing that is very convenient is that one stop of aperture changes things the same amount as one step (halving or doubling) in shutter speed, so we can to some extent dance between them.
Most modern cameras are capable of working in one-third steps, so in fact there are two finer choices available between, say, 1/250th and 1/125th, but thats a bit of a detail and doesnt really change the fundamentals.
3: How Do We Do It In Practice?
To take complete control of the camera, set in Manual mode. This is probably marked as M and details of how to do it for your camera are in the instruction book that came with it - it's difficult for me to describe it for every possible camera. You're looking for something marked mode, or possibly PSAM, or on Canon cameras PTVAVM.
When you look through the camera and half press the release button, you will see some sort of meter display in the viewfinder. It normally consists of a group of vertical or horizontal ticks, with 0 in the middle and going from +2 to -2. These numbers are the same as one move on the aperture scale or a halving or doubling of shutter speed and are referred to as stops. A 1-stop difference is a halving or doubling of the amount of light the camera collects.
Basically what you do is twiddle with aperture and/or shutter speed until the meter reads 0, and then you have about the right amount of light for the scene. If the meter reads low, keep reducing the aperture and/or shutter speed numbers (remember that smaller numbers mean more light) until it arrives at the middle (bear in mind if you are way off, the meter will be just stuck at +2 or -2 until you get somewhere close).
Trust the theory and it will get you there bigger numbers, less light, smaller numbers, more light.
4: That Sounds Too Easy?
Well, yes. There are a couple of wrinkles you may encounter.
The first and most obvious one is that some of the choices the camera will let you make might well be bad for your pictures. It isn't your mother and it wont stop you from doing things that might turn out unhelpful. In the days of film, if you didn't know this, you wasted a lot of film. Ask me how I know.
The Big One
The big one is that the hole is open for so long that you can't hold the camera still to get a sharp picture.
Typically, the hole is open for a really short period of time and so it's no problem, but if you make the hole very small and there isn't much light, you will find the hole needs to stay open for longer and longer. If you don't know the focal length[5] of your lens, then try and keep the shutter speed number above 60 (or below 1/60th of a second if you prefer to think of it that way). If you do know the focal length of your lens, try and keep the shutter speed number above the focal length. So if you have a 200 mm lens, try not to go lower than about 250 on the display or 1/250th of a second[6].
If you are indoors then you might find you are at the lowest aperture number (sometimes referred to as the "widest", or even more confusingly the "biggest") and your shutter speed is nowhere near high enough. When I was a boy that meant you either got out a flash gun, loaded some fast film or just put the camera down. These days, professional cameras like the Nikon D3S can take perfectly acceptable pictures in light in which it is difficult to read unaided and so there is no need to resort to mood-ruining flash.
The key to this is rate at which the camera counts bananas[7], often referred to as the ISO setting.
On one of our really bright days, we count bananas 100 at a time. If there are less than a thousand bananas reflected from something then it looks black in the picture and if we get 100,000 bananas it looks white. In Miserable Manchester meanwhile, we count bananas 0.1 at a time. 100 bananas looks white and 0.1 - one tenth - of a banana or less looks black.
The rate at which we count bananas is the ISO setting. "ISO" stands for International Standards Organisation and so ISO is a shorthand for ISO 12232, a standard procedure for defining banana-counting rate in digital photography. As you can see, there are at least 12231 other standards which cover everything from the colour-fastness of toilet paper to the requirement for a condom to stretch 600%. Im not making up either of those. When I was a boy, film speed was referred to as ASA, the American Standards Association, but in this new-fangled global society we've gone all international.
For me, ISO control is a secondary control rather than a primary one. That's all in my mind; in the days of film I could only change it once every 24 or 36 shots and I needed a good level of foresight to have a good range of choice with me; now I can use a different level of ISO on every picture if I want, but I still often think of it as a secondary choice. I just think two things is enough to twiddle
Typically, counting bananas very finely makes for worse pictures than counting them coarsely, for reasons I wont go into right now. Keep the ISO setting as low as possible while not letting the shutter speed number get too small.
The Other One
The other wrinkle is that what the camera thinks is right might not actually be right. When the camera measures the amount of light, it gets referred to as metering - using a light meter to make a measurement.
There have been tremendous advances in camera metering since I was a boy. Nevertheless the camera is looking at what you want to photograph and measuring the light being reflected off it. To get a true measure of the light falling on a scene, we need a different sort of light meter, known as an incident light meter, but your camera hasn't got one. It's not incident in the sense of "The Yangtse Incident" but incident as in "incoming".
So, what the camera has to do is make some sort of presumption about the light coming in. The basic presumption is that across the scene the average level of reflected light is a sort of mid-grey level. A lot of the time that's good enough but if you are photographing a black kitten on coal or a white swan on snow then its not, as it will try to render both of them as mid-grey. You can imagine the poor-old metering gets a bit confused if there's sky in the picture, too, as its not sure whether its the prize-winning lawn in the foreground you want properly exposed or the cutely fluffy cloud in the shape of strange potato you once had as a child.
There was a time when we would agonise over metering and cameras are still equipped with three different styles of metering to try and improve our chances. If we're still unsure we can take several photographs ranging from definitely too light to definitely too dark and hope that one in the middle captures what we want.
For now, in such a basic tutorial as this, I'm going to say use the default metering setting and use the exposure compensation button (often marked +/-) if you don't like how the picture turns out. We can explore the other metering settings another time.
The display on the back of the camera is a bit rubbish for evaluating these things, so I'd recommend using the "histogram" function to see whether or not the picture has light evenly from dark to light. However, I'd counsel against obsessively looking at the histogram after every picture - a practice referred to pejoratively as chimping - and instead I'd suggest taking a sequence from dark to light and then later on look at the histograms to decide which to keep. If you have to do something with the display then I'd encourage you to use "highlight blink", which you can find in the manual. This tells you which parts of the picture are blown - have too much light and have gone white. A few little specks are ok but if large slices of sky are blinking, you might like to take in less light - higher aperture number, higher shutter speed number, or both. Certainly if anyone's face is blinking, the picture is a dud. Suck it up, try
again.
5: In Conclusion
The bottom line with all of this is practice, practice, practice. Practice in non-critical situations so you get it right when it matters. It's just the size of the hole and the length of time you leave it open for. Thats all you need to know to be an exposure-meister.
Damian Harty .com
[1] Light levels are actually measured in lux. A lux is 1 lumen per square metre. You might not want to know what a lumen is, but if you do then its the total luminous flux emitted into a solid angle of one steradian if a light source emits one candela of luminous intensity uniformly across that angle. I did say you might not want to know and it's not my fault you kept reading.
[2] While I use a "rain of light" as a metaphor, it's not a bad one. Light comes in little drops called photons and the camera really does count photons. Quite quickly, obviously, since it can count to about 4000 in ten million places, three times over in a single second in the case of a D40 and to about 16000 in twelve million places, ten times a second in the case of D3s. That's a lot of counting.
[3] In a lot of cameras there are some intermediate positions between the numbers above, known as half stops if there is one and third stops if there are two.
[4] I'm being unfair in deriding the early pioneers who worked all this stuff out. How were they to know that the worlds population would grow towards 7 billion and that we'd have cameras on our mobile telephones? By the time its become popular the terminology is too embedded to change, so unfortunately you just have to deal with it. But I am sympathetic about how confusing it looks to an outsider.
[5] Don't worry what this means, well get to it in another lesson.
[6] This is an old school rule of thumb and not any sort of hard and fast boundary, just a helpful thing to keep in mind. If your hobby is being an Olympic marksman, you might have quite a steady hand and will laugh at the 1/focal length rule. If you have some sort of nervous affliction you might find it isn't enough. Its just a guide, ok?
[7] I started using bananas as the unit of light just because it doesn't really matter what the units are - see note [1].
I'm presuming you're reading this because you're interested in venturing out from under the auto umbrella. This post is what I regard as the very foundation of successful photography - Exposure - a word that gets used to describe the amount of light we allow the camera to capture.
1: Why does it matter?
Summary
Very simply, if we allow the camera to capture too much light, then the whole picture is white. If we dont allow the camera to capture enough light, then the whole picture is black.
A Bit More Detail
You might be thinking, well whats the big deal, my eyes get it right in all sorts of different places? You would, however, be missing quite how marvelous the eye is.
On a bright sunny day, outside in the sun at the equator, the light is streaming down and bouncing joyously around, higgledy piggledy. If I measured light in bananas[1], then there might be 100,000 of them on such a day.
On a very dark day, like the sort of sullen apology for a day we get here in England in Manchester in the middle of January, there might only 100 bananas. Thats a thousand times less light and yet apart from feeling a bit grumpy with everyone, we barely notice. Some might argue that Manchester just does that to people anyway.
If we went out on a moonlit night, there is only one tenth of a banana. For sure we notice that's darker than the day but on the whole we have no problem getting about in it. The other day I drove a car at 70 mph on a deserted motorway (highway) by moonlight alone just because I could. It's a thousand times less than our miserable Manchester midwinter morning and a million times less than the bright sunny day with which we started.
A millionfold variation in light levels is a bit much to ask of our cameras. In any case, you may also have noticed that in morose Manchester you can still see white paper and dark shadows just like you can in the sun, so clearly our mind or eyes (or both) is making something a thousand times darker (the piece of paper in Mizzogville) still appear white, just like it does in the sun.
So you can see that actually it is something of a big deal. A good camera can capture, in a single image, something like a thousandfold difference between something very light and something very dark. If we set the camera to capture our 100,000 bananas in the equatorial sun as fully bright, then we took it to Mank City it would only see darkness.
All this means we need a way to control the amount of light coming into the camera.
2: How Do We Do It In Theory?
Summary
In summary we've got the size of the hole (aperture) and the length of time it's open (shutter speed), and they are both defined in such a way that the familiar definitions give us something where a bigger number means less light. One thing that is very convenient is that one step (stop) of aperture changes things the same amount as one step (halving or doubling) in shutter speed, so we can to some extent dance between them.
Most modern cameras are capable of working in one-third steps, so in fact there are two finer choices available between, say, 1/250th and 1/125th, but that's a bit of a detail and doesnt really change the fundamentals.
A Bit more Detail
The camera is a light-gathering device. It captures the constant rain of light[2] in a bucket, then measures how much light in the bucket and writes it to an electronic file. Actually its a lot of little buckets to give you lots of points of information to define the picture. If we let too much light in then all the buckets are full and the file is completely white. If we don't let enough light in then there just some tiny splashes in the bottom of the buckets and the file is more or less completely dark.
Getting control is not very complicated, we have a hole and a cover over the hole. We can control the size of the hole and control for how long we uncover it.
The size of the hole doesn't sound grand enough, so we are inclined to call it aperture because it makes us feel better. Its also sometimes referred to as an f-stop, often with a flamboyant long f. Its not time to get mired in details about why its called that or where it comes from you dont really need to know that unless you are going to design lenses.
The really irritating thing for me about f-stops is that a little number means a big hole and a big number means a little hole. Whose idea of a good idea was that?
A big hole, also known as f-stop 2 or just f2
A little hole, also known as f16
f-stops go in a non-obvious progression, evidence of true genius at work, with twice the area of hole being signalled by (drum roll) a factor of the square root of 2. Dont worry, because you don't really need to know about it. If you're an apologist you might point out that a doubling of the area means an increase of 2 in diameter. I don't care, theres no excuse for having such an inaccessible set of numbers that I'm supposed to use when I'm cold, wet and tired. Anyway, enough of my grumbling.
There is a pattern of numbers which used to be engraved on lenses in the good old days, but is now displayed in an LCD panel[3]. This pattern goes something like:
1.4 2 2.8 4 5.6 8 11 16 22 32
Your camera and/or lens might not have all those numbers but it will probably have some recognizable subset of them.
Each of these intervals is equal in terms of the change it makes, and each is known as 1 stop or 1 f-stop. I tell you this so you can uncover the next bluffer who crosses your path, rather than so you can memorise it - I won't be testing you on it. As I got cross about earlier, a bigger number means a smaller hole. Although it doesn't look very obvious, you soon get used to counting clicks on your camera as you set these numbers, so it doesn't actually matter if the sequence makes no sense to you.
The other primary control - I'll come onto what I mean by that in a minute - is how long we uncover the hole for. This is referred to as shutter speed. Yet again we want to work with steps that halve or double the amount of light in order to get control of exposure.
Yet again, some genius of terminology decided that working with ordinary numbers is too easy[4] and so the numbers on your camera are the bottom line of a fraction, giving you the time in seconds your shutter is open. So when your camera says 250 it actually means the shutter is open for 1/250th of a second. If you want more light, you need it open for longer. Is that 125 on the dial or 500? Yeah, see what I mean about the genius bit? It's 125 on the dial, because that means 1/125th of a second, which is 2/250ths of a second. This notation gets a bit inconvenient if you hold the shutter open for a very long time, if youre using a tripod for example, so the camera will add double quotes after the number if it is in whole seconds - thus 2 means half a second and 2" means 2 seconds.
In summary we've got aperture and shutter speed and they are both defined in such a way that the familiar definitions give us something where a bigger number means less light. One thing that is very convenient is that one stop of aperture changes things the same amount as one step (halving or doubling) in shutter speed, so we can to some extent dance between them.
Most modern cameras are capable of working in one-third steps, so in fact there are two finer choices available between, say, 1/250th and 1/125th, but thats a bit of a detail and doesnt really change the fundamentals.
3: How Do We Do It In Practice?
To take complete control of the camera, set in Manual mode. This is probably marked as M and details of how to do it for your camera are in the instruction book that came with it - it's difficult for me to describe it for every possible camera. You're looking for something marked mode, or possibly PSAM, or on Canon cameras PTVAVM.
When you look through the camera and half press the release button, you will see some sort of meter display in the viewfinder. It normally consists of a group of vertical or horizontal ticks, with 0 in the middle and going from +2 to -2. These numbers are the same as one move on the aperture scale or a halving or doubling of shutter speed and are referred to as stops. A 1-stop difference is a halving or doubling of the amount of light the camera collects.
Basically what you do is twiddle with aperture and/or shutter speed until the meter reads 0, and then you have about the right amount of light for the scene. If the meter reads low, keep reducing the aperture and/or shutter speed numbers (remember that smaller numbers mean more light) until it arrives at the middle (bear in mind if you are way off, the meter will be just stuck at +2 or -2 until you get somewhere close).
Trust the theory and it will get you there bigger numbers, less light, smaller numbers, more light.
4: That Sounds Too Easy?
Well, yes. There are a couple of wrinkles you may encounter.
The first and most obvious one is that some of the choices the camera will let you make might well be bad for your pictures. It isn't your mother and it wont stop you from doing things that might turn out unhelpful. In the days of film, if you didn't know this, you wasted a lot of film. Ask me how I know.
The Big One
The big one is that the hole is open for so long that you can't hold the camera still to get a sharp picture.
Typically, the hole is open for a really short period of time and so it's no problem, but if you make the hole very small and there isn't much light, you will find the hole needs to stay open for longer and longer. If you don't know the focal length[5] of your lens, then try and keep the shutter speed number above 60 (or below 1/60th of a second if you prefer to think of it that way). If you do know the focal length of your lens, try and keep the shutter speed number above the focal length. So if you have a 200 mm lens, try not to go lower than about 250 on the display or 1/250th of a second[6].
If you are indoors then you might find you are at the lowest aperture number (sometimes referred to as the "widest", or even more confusingly the "biggest") and your shutter speed is nowhere near high enough. When I was a boy that meant you either got out a flash gun, loaded some fast film or just put the camera down. These days, professional cameras like the Nikon D3S can take perfectly acceptable pictures in light in which it is difficult to read unaided and so there is no need to resort to mood-ruining flash.
The key to this is rate at which the camera counts bananas[7], often referred to as the ISO setting.
On one of our really bright days, we count bananas 100 at a time. If there are less than a thousand bananas reflected from something then it looks black in the picture and if we get 100,000 bananas it looks white. In Miserable Manchester meanwhile, we count bananas 0.1 at a time. 100 bananas looks white and 0.1 - one tenth - of a banana or less looks black.
The rate at which we count bananas is the ISO setting. "ISO" stands for International Standards Organisation and so ISO is a shorthand for ISO 12232, a standard procedure for defining banana-counting rate in digital photography. As you can see, there are at least 12231 other standards which cover everything from the colour-fastness of toilet paper to the requirement for a condom to stretch 600%. Im not making up either of those. When I was a boy, film speed was referred to as ASA, the American Standards Association, but in this new-fangled global society we've gone all international.
For me, ISO control is a secondary control rather than a primary one. That's all in my mind; in the days of film I could only change it once every 24 or 36 shots and I needed a good level of foresight to have a good range of choice with me; now I can use a different level of ISO on every picture if I want, but I still often think of it as a secondary choice. I just think two things is enough to twiddle
Typically, counting bananas very finely makes for worse pictures than counting them coarsely, for reasons I wont go into right now. Keep the ISO setting as low as possible while not letting the shutter speed number get too small.
The Other One
The other wrinkle is that what the camera thinks is right might not actually be right. When the camera measures the amount of light, it gets referred to as metering - using a light meter to make a measurement.
There have been tremendous advances in camera metering since I was a boy. Nevertheless the camera is looking at what you want to photograph and measuring the light being reflected off it. To get a true measure of the light falling on a scene, we need a different sort of light meter, known as an incident light meter, but your camera hasn't got one. It's not incident in the sense of "The Yangtse Incident" but incident as in "incoming".
So, what the camera has to do is make some sort of presumption about the light coming in. The basic presumption is that across the scene the average level of reflected light is a sort of mid-grey level. A lot of the time that's good enough but if you are photographing a black kitten on coal or a white swan on snow then its not, as it will try to render both of them as mid-grey. You can imagine the poor-old metering gets a bit confused if there's sky in the picture, too, as its not sure whether its the prize-winning lawn in the foreground you want properly exposed or the cutely fluffy cloud in the shape of strange potato you once had as a child.
There was a time when we would agonise over metering and cameras are still equipped with three different styles of metering to try and improve our chances. If we're still unsure we can take several photographs ranging from definitely too light to definitely too dark and hope that one in the middle captures what we want.
For now, in such a basic tutorial as this, I'm going to say use the default metering setting and use the exposure compensation button (often marked +/-) if you don't like how the picture turns out. We can explore the other metering settings another time.
The display on the back of the camera is a bit rubbish for evaluating these things, so I'd recommend using the "histogram" function to see whether or not the picture has light evenly from dark to light. However, I'd counsel against obsessively looking at the histogram after every picture - a practice referred to pejoratively as chimping - and instead I'd suggest taking a sequence from dark to light and then later on look at the histograms to decide which to keep. If you have to do something with the display then I'd encourage you to use "highlight blink", which you can find in the manual. This tells you which parts of the picture are blown - have too much light and have gone white. A few little specks are ok but if large slices of sky are blinking, you might like to take in less light - higher aperture number, higher shutter speed number, or both. Certainly if anyone's face is blinking, the picture is a dud. Suck it up, try
again.
5: In Conclusion
The bottom line with all of this is practice, practice, practice. Practice in non-critical situations so you get it right when it matters. It's just the size of the hole and the length of time you leave it open for. Thats all you need to know to be an exposure-meister.
Damian Harty .com
[1] Light levels are actually measured in lux. A lux is 1 lumen per square metre. You might not want to know what a lumen is, but if you do then its the total luminous flux emitted into a solid angle of one steradian if a light source emits one candela of luminous intensity uniformly across that angle. I did say you might not want to know and it's not my fault you kept reading.
[2] While I use a "rain of light" as a metaphor, it's not a bad one. Light comes in little drops called photons and the camera really does count photons. Quite quickly, obviously, since it can count to about 4000 in ten million places, three times over in a single second in the case of a D40 and to about 16000 in twelve million places, ten times a second in the case of D3s. That's a lot of counting.
[3] In a lot of cameras there are some intermediate positions between the numbers above, known as half stops if there is one and third stops if there are two.
[4] I'm being unfair in deriding the early pioneers who worked all this stuff out. How were they to know that the worlds population would grow towards 7 billion and that we'd have cameras on our mobile telephones? By the time its become popular the terminology is too embedded to change, so unfortunately you just have to deal with it. But I am sympathetic about how confusing it looks to an outsider.
[5] Don't worry what this means, well get to it in another lesson.
[6] This is an old school rule of thumb and not any sort of hard and fast boundary, just a helpful thing to keep in mind. If your hobby is being an Olympic marksman, you might have quite a steady hand and will laugh at the 1/focal length rule. If you have some sort of nervous affliction you might find it isn't enough. Its just a guide, ok?
[7] I started using bananas as the unit of light just because it doesn't really matter what the units are - see note [1].
Subscribe to:
Posts (Atom)

